Audi A6 Typ 4G: Tail Lamp, Correcting Installed Position
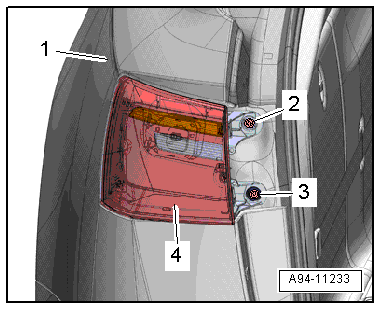
Body Tail Lamp, Aligning, Sedan
Adjustment in Direction of Travel:
- Turn the light switch to position "0".
- Remove the cover -2- from the tail lamp assembly in direction of -arrow A-.
- Remove the bolts -3 and 4-.
 Note
Note
Ignore -item 1 and arrow B-.
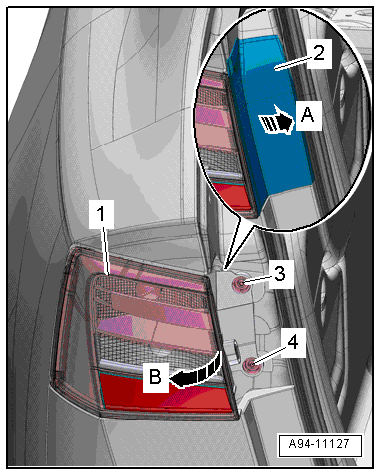
- Turn the adjusting nuts -2 and 3- in and out in stages.
- The tail lamp assembly -4- must be flush with the body -1-.
Body Tail Lamp, Aligning, Avant
Adjustment in Direction of Travel:
- Turn the light switch to position "0".
- Remove the cover -2- from the tail lamp assembly in direction of -arrow A-.
- Remove the bolts -3 and 4-.
Note
Ignore -item 1- and -arrow B-.
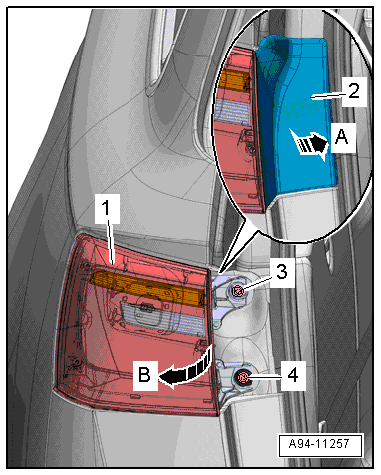
- Turn the adjusting nuts -2 and 3- in and out in stages.
- The tail lamp assembly -4- must be flush with the body -1-.
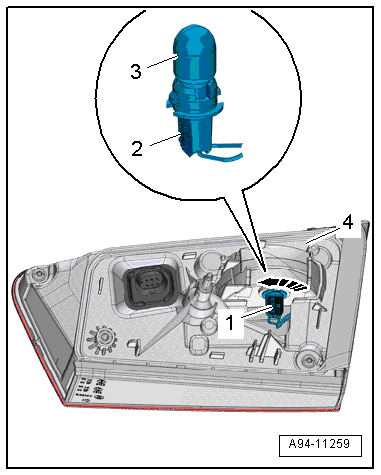
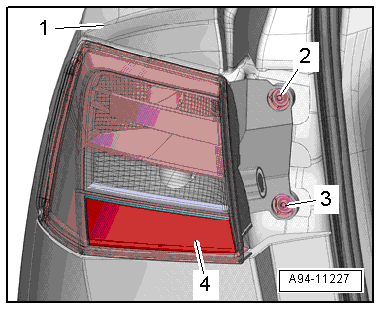
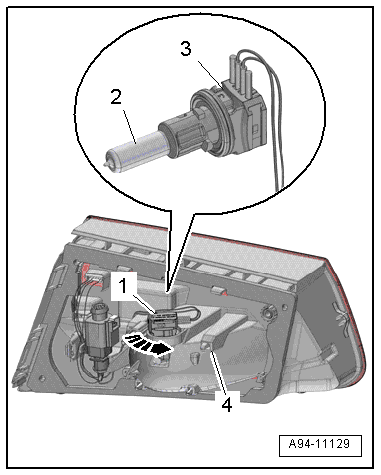
Left/Right Rear Fog Lamp Bulb -L46-/-L47-, Removing and Installing
Left/Right Rear Fog Lamp Bulb -L46-/-L47-, Removing and Installing, LED Tail Lamp, Sedan
Removing
- Remove the inner tail lamp. Refer to → Chapter "Rear Lid Tail Lamp, Removing and Installing, Sedan".
- Turn the bulb socket -1- counterclockwise -arrow- and remove it from the housing -4-.
- Remove the bulb -2- from the bulb socket -3-.
Installing
Install in reverse order of removal. Note the following:
- Insert new bulbs in the bulb socket. Do not touch the glass bulbs with bare hands.
- Install the inner tail lamp. Refer to → Chapter "Rear Lid Tail Lamp, Removing and Installing, Sedan".
Back-Up Lamp, Removing and Installing
Left and Right Back-Up Lamp Bulb -M16-/-M17-, Removing and Installing, LED Tail Lamp, Avant
Removing
- Remove the inner tail lamp. Refer to → Chapter "Rear Lid Tail Lamps, Removing and Installing, Avant".
- Turn the bulb socket -1- counterclockwise -arrow- and remove it from the housing -4-.
- Remove the bulb -3- from the bulb socket -2-.
Installing
Install in reverse order of removal. Note the following:
- Insert new bulbs in the bulb socket. Do not touch the glass bulbs with bare hands.