Audi A6 Typ 4G: Gears, Shafts
Input Shaft
Input Shaft Ball Bearing, Replacing
Special tools and workshop equipment required
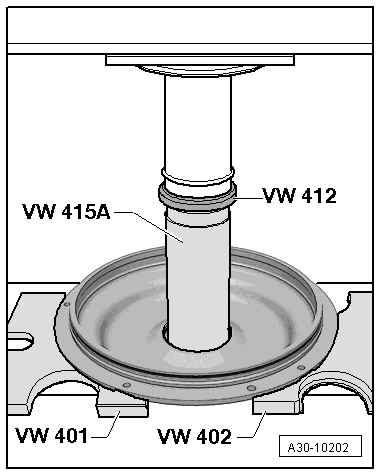
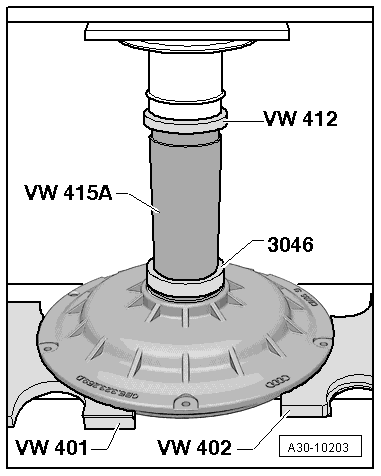
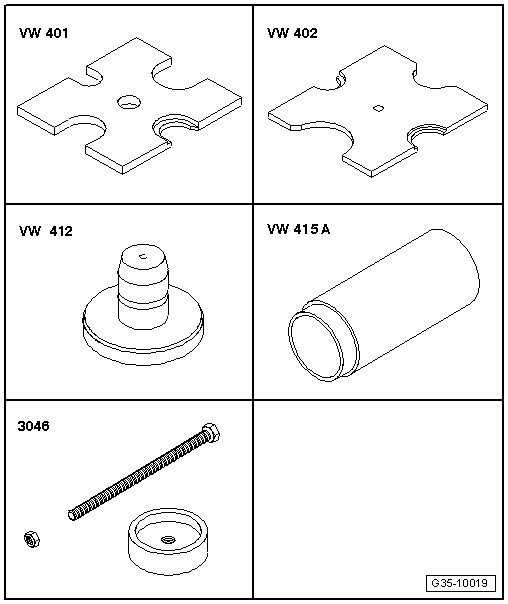
- Press Plate -VW401-
- Press Plate -VW402-
- Press Piece - Multiple Use -VW412-
- Press Piece - 60mm - VW415A-
- Puller -3046-
Removing
- Remove the dual clutch -1-. Refer to → Chapter "DSG Clutch, Removing".
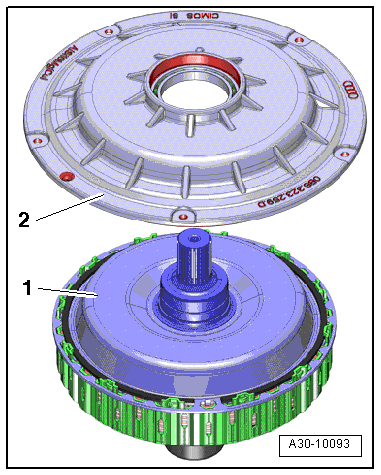
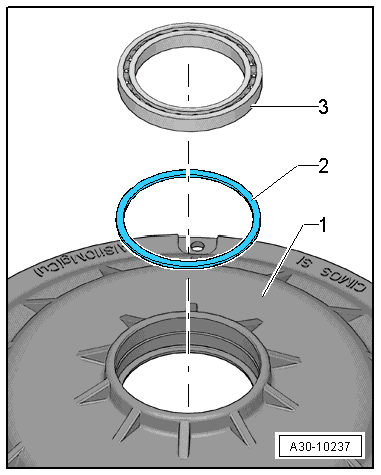
- Remove the locking ring -arrow- from the removed clutch cover.
- Remove the dual clutch ball bearing.
 Note
Note
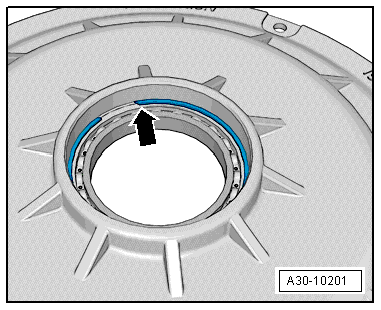
- There may still be a thrust washer -2- behind the ball bearing -3- depending on the clutch cover date of manufacture. If there is, then replace the old one with a new one when installing the new ball bearing.
- Replace the ball bearing -3-.
Installing
Install in reverse order of removal. Note the following:
- Replace the O-ring and locking rings. Refer to → Chapter "Overview - Flywheel and Dual Clutch".
Note
The clutch cover may have or may not have a thrust washer -2-, depending on the date of manufacture. Allocation. Refer to the Parts Catalog.
- If it was there during the removal, then insert a thrust washer -2- into the cover -1-.
- Install the new dual clutch ball bearing all the way.
- Position the Press Piece - 60mm -VW415A- with the thin shoulder facing up.
- Install the new ball bearing circlip -arrow-.
- Clean the sealing surface on the clutch cover.
Input Shaft Seal, Replacing
Special tools and workshop equipment required
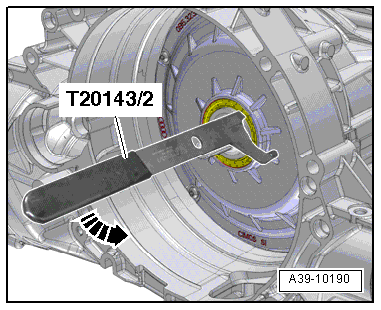
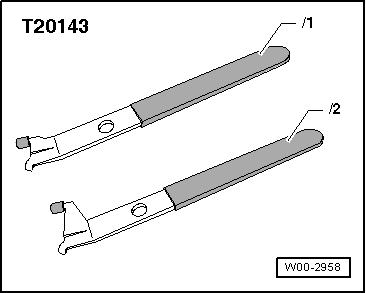
- Pulling Hook -T20143/2-
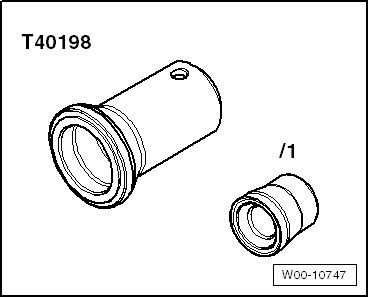
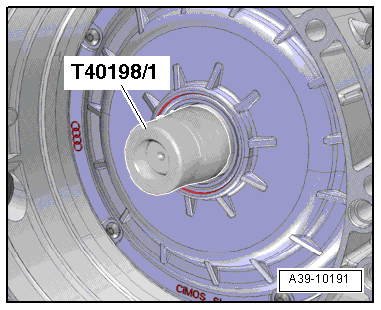
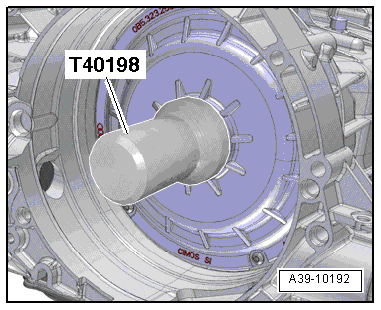
- Seal Installer - Input Shaft -T40198-
- Grease. Refer to the Parts Catalog.
Procedure
- Secure the transmission on the Engine And Transmission Holder -VAS6095-. Refer to → Chapter "Securing on Engine and Transmission Holder".
- Remove the flywheel. Refer to → Chapter "Flywheel, Removing and Installing".
- Pry out the input shaft seal with the Pulling Hook -T20143/2-.
- Place the Seal Installer - Input Shaft Guide Sleeve -T40198/1- on the drive axle.
- Lightly coat the outer circumference of the new shaft seal with oil.
- Fill the space between the sealing- and dust lip half way with sealing grease. Refer to the Parts Catalog.
- Install the shaft seal on the guide sleeve.
- Installed position: Open side of shaft seal faces transmission.
- Drive in the shaft seal with the Seal Installer - Input Shaft -T40198- until it stop without tilting.
- Install the flywheel. Refer to → Chapter "Flywheel, Removing and Installing".
Special Tools
Special tools and workshop equipment required
- Press Plate -VW401-
- Press Plate -VW402-
- Press Piece - Multiple Use -VW412-
- Press Piece - 60mm -VW415A-
- Puller -3046-
- Pulling hook -T20143/2-
- Seal Installer - Input Shaft -T40198-