Audi A6 Typ 4G (2011–2018) Workshop Manual / Body / Body Exterior / Sunroof / Overview - Water Drain Hoses
Audi A6 Typ 4G: Overview - Water Drain Hoses
Overview - Water Drain Hoses, Sedan
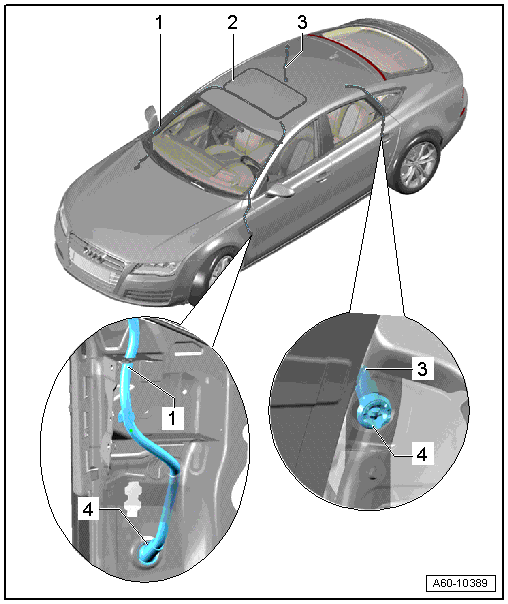
1 - Front Water Drain Hose
- The front water drain hoses are routed along the " A-pillars" and end at the bottom of the " A-pillar" behind the door.
- Clean the Panorama sunroof immediately.
2 - Sunroof Frame
3 - Rear Water Drain Hose
- Rear water drain hoses are routed along the " D-pillars" and end in wheel housing above wheel housing liner.
- Start cleaning the hose from the bottom end.
- To do so, rear wheel housing liner must be removed.
4 - "A-Pillar" grommet
- Must be pushed in completely.
Overview - Water Drain Hoses, Sedan with Panorama Roof
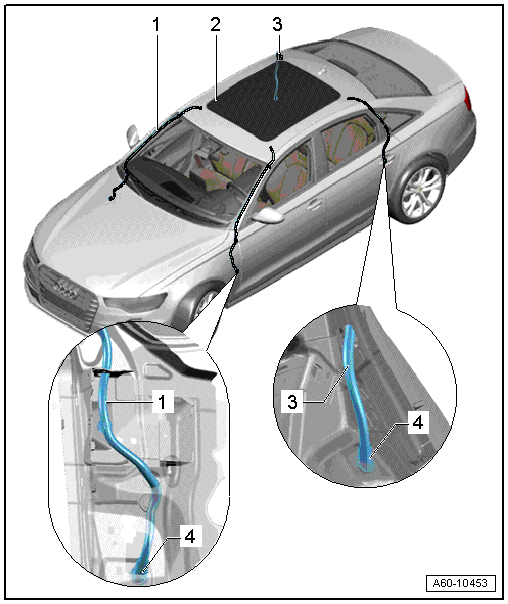
1 - Front Water Drain Hose
- Removing and installing. Refer to → Chapter " Front Water Drain Hoses, Removing and Installing, Avant".
2 - Panorama Sunroof
3 - Rear Water Drain Hose
- Removing and installing. Refer to → Chapter " Rear Water Drain Hoses, Removing and Installing, Avant".
4 - Grommet
Overview - Water Drain Hoses, Avant with Panorama Roof
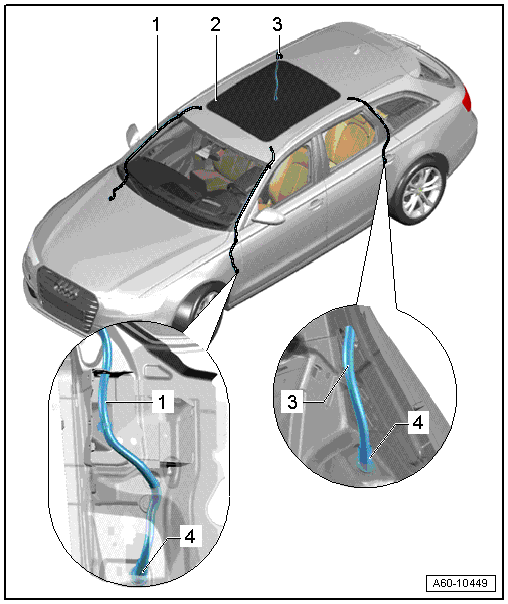
1 - Front Water Drain Hose
- Removing and installing. Refer to → Chapter " Front Water Drain Hoses, Removing and Installing, Avant".
2 - Panorama Sunroof
3 - Rear Water Drain Hose
- Removing and installing. Refer to → Chapter " Rear Water Drain Hoses, Removing and Installing, Avant".
4 - Grommet
