Audi A6 Typ 4G: Water Drain Hoses, Cleaning
Front Water Drain Hoses, Cleaning
Special tools and workshop equipment required
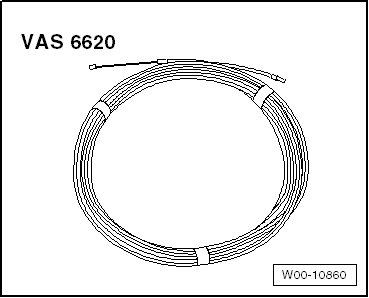
- Drain Snake - VAS 6620-
The front water drain hoses run through and end in the A-pillar.
 Note
Note
Use Drain Snake - VAS 6620- to clean the water drain hoses.
- Open the sunroof panel and start from the upper hose end.
Rear Water Drain Hoses, Cleaning
Special tools and workshop equipment required
- Drain Snake - VAS 6620-
The rear water drain hoses run into the D-pillars and end in the rear wheel housings.
Note
Use Drain Snake - VAS 6620- to clean the water drain hoses.
Start cleaning the hose from the bottom end.
To do this, loosen the rear wheel housing liner and push it to the side.
Water Drain Hoses, Removing and Installing
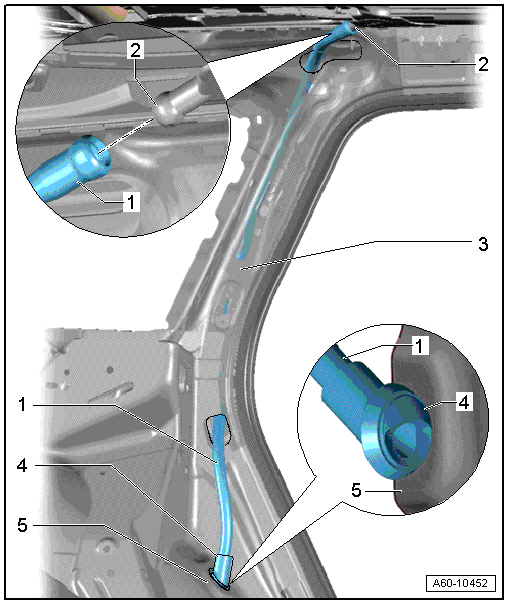
Front Water Drain Hoses, Removing and Installing, Sedan
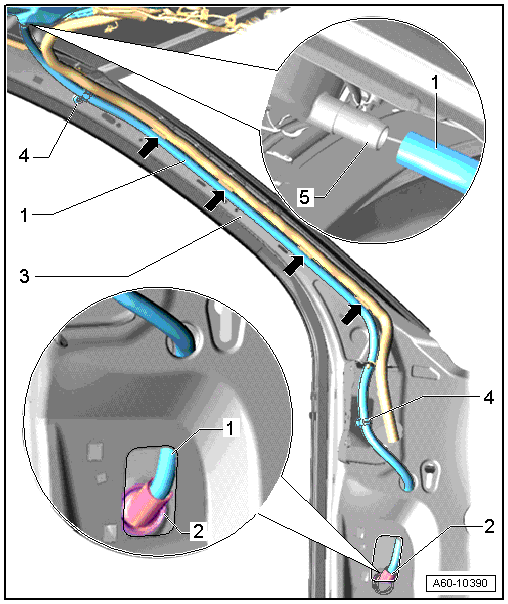
1 - Front Water Drain Hose
- Removing:
- Remove the trim on the A-pillar. Refer to → Body Interior; Rep. Gr. 70; Passenger Compartment Trim; A-Pillar Trim Panel, Removing and Installing.
- Remove the water drain hose from the connection - 5-, open the hose bracket - 4- and remove the clip.
- Remove the grommet at the bottom of the A-pillar - 2- and pull the water drain hose downward out of the A-pillar.
- Installing:
- Install the hose back into the A-pillar from the bottom.
- Push it upward as illustrated, pull it out and attach it to the Panorama sunroof connection.
- Push the water drain hose into the clip - arrows- and secure it with the hose bracket.
2 - Grommet
- The grommet is firmly attached to the water drain hose and must be pressed into A-pillar at the bottom.
3 - Front Connection for Water Drain
- Push the hose all the way onto the end piece when installing.
4 - Hose Bracket
5 - Front Connection
Rear Water Drain Hoses, Removing and Installing, Sedan
1 - Rear Water Drain Hose
- Removing:
- Remove the D-pillar trim panel. Refer to → Body Interior; Rep. Gr. 70; Passenger Compartment Trim; D-Pillar Trim Panel, Removing and Installing.
- Remove the rear wheel housing liner. Refer to → Chapter "Rear Wheel Housing Liner, Removing and Installing".
- Open the hose bracket - 3- and remove the water drain hose from the connection - 2-.
- Remove the grommet - 4- at the top of the wheel housing and remove the water drain hose downward.
- Installing:
- Push the hose back into the wheel housing from the bottom.
- Insert the hose from the bottom, as illustrated, and pull it upward along the D-pillar until the end of the hose is sticking out of the Panorama sunroof.
- Install the rear grommet into the wheel housing.
- Secure the water drain hose with the hose bracket.
2 - Water Drain Rear Connection
3 - Hose Bracket
4 - Grommet
- Must be pushed completely into the wheel housing
5 - Wheel Housing
Front Water Drain Hoses, Removing and Installing, Avant
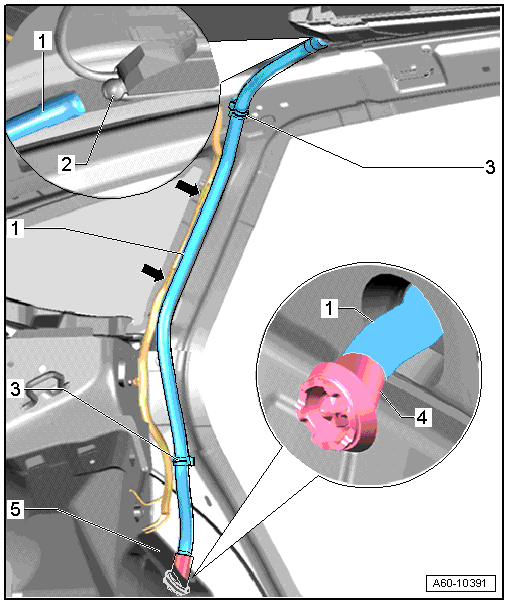
1 - Front Water Drain Hose
- Removing:
- Remove the trim on the A-pillar. Refer to → Body Interior; Rep. Gr. 70; Passenger Compartment Trim; A-Pillar Trim Panel, Removing and Installing.
- Pull the water drain hose off the connection - 3- and remove it from the bracket - 4-.
- Unclip the water drain hose at the four locations shown - arrows-.
- Remove the grommet at the bottom of the A-pillar - 2- and pull the water drain hose downward out of the A-pillar.
- Installing:
- Install the hose back into the A-pillar from the bottom.
- Push the hose through the opening in the A-pillar reinforcement and clip it.
- Push it upward as illustrated, pull it out and attach it to the Panorama sunroof connection.
- Push the water drain hose into the clips - arrows- and secure it in the bracket - 4-.
2 - Grommet
- The grommet is firmly attached to the water drain hose and must be pressed into A-pillar at the bottom.
3 - Connection
4 - Bracket
Rear Water Drain Hoses, Removing and Installing, Avant
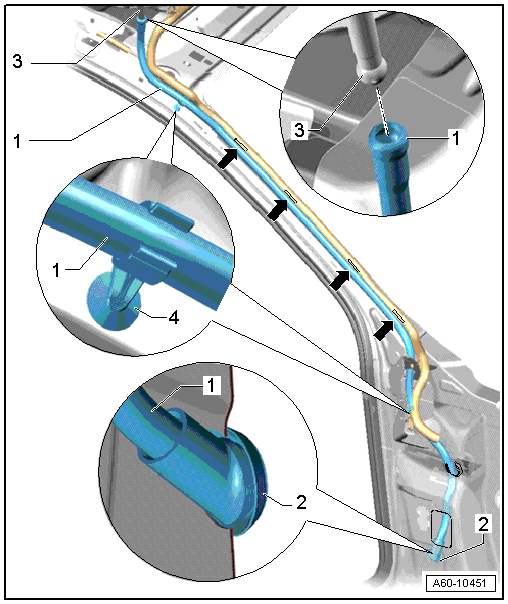
1 - Rear Water Drain Hose
- Removing:
- Remove the D-pillar trim panel. Refer to → Body Interior; Rep. Gr. 70; Passenger Compartment Trim; D-Pillar Trim Panel, Removing and Installing.
- Remove the rear wheel housing liner. Refer to → Chapter "Rear Wheel Housing Liner, Removing and Installing".
- Pull the water drain hose off the connection - 2-.
Note
Before pulling the water drain hose, tie a string to help pull it out.
- Remove the grommet - 4- at the top of the wheel housing and remove the water drain hose downward.
- Installing:
- Push the hose back into the wheel housing from the bottom.
- Push it upward along the D-pillar and then attach it to the connection on the Panorama sunroof.
- Install the rear grommet into the wheel housing.
2 - Connection
3 - C-Pillar
4 - Grommet
- Must be pushed completely into the wheel housing
5 - Wheel Housing
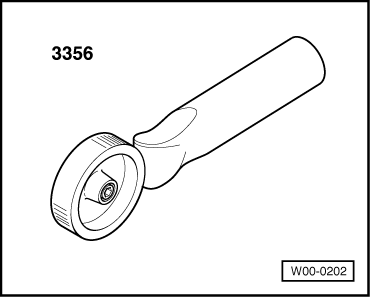
Special Tools
Special tools and workshop equipment required
- Roller -3356-
- Drain Snake -VAS6620-