Audi A6 Typ 4G (2011–2018) Workshop Manual / Body / Body Interior / Passenger Protection, Airbags, Seat Belts / Overview - Knee Airbag
Audi A6 Typ 4G: Overview - Knee Airbag
Overview - Knee Airbag, Driver Side
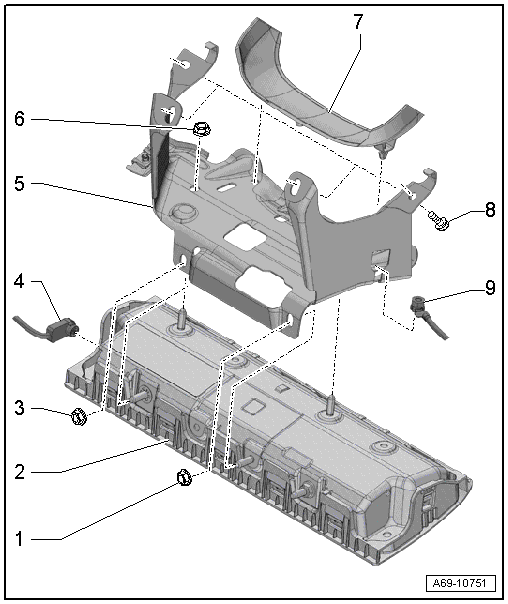
1 - Nut
- 8 Nm
- Replace
2 - Driver Side Knee Airbag
- With the Driver Knee Airbag Igniter -N295-
 WARNING
Follow all Safety Precautions when working with pyrotechnic components. Refer to → Chapter "Pyrotechnic Components Safety Precautions".
- Removing and installing. Refer to → Chapter "Driver Side Knee Airbag with Igniter, Removing and Installing".
3 - Nut
- 8 Nm
- Replace
4 - Connector
- For the Driver Knee Airbag Igniter -N295-
- Disconnecting and connecting
5 - Bracket
- For the driver knee airbag
- Removing and installing. Refer to → Chapter "Driver Side Knee Airbag with Igniter, Removing and Installing".
6 - Nut
- 8 Nm
- Replace
7 - Gap Cover
- Clip to the bracket
8 - Bolt
- 9 Nm
- Quantity: 4
- Replace
- Tightening sequence
9 - Nut
- 9 Nm
- With connection for the Ground (GND) cable
Overview - Knee Airbag, Front Passenger Side
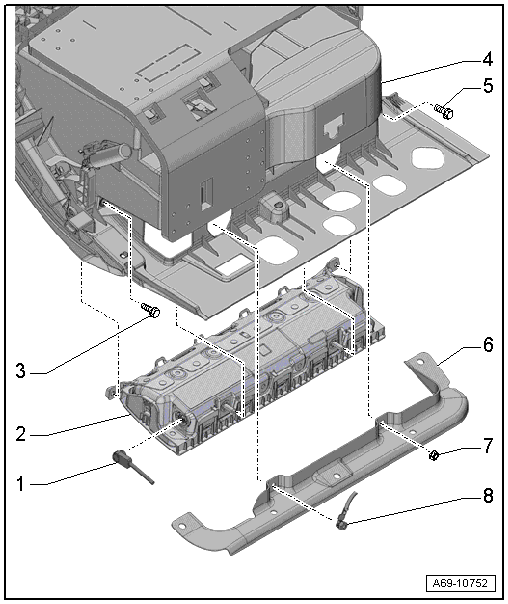
1 - Connector
- For Front Passenger Knee Airbag Igniter -N296-
- Disconnecting
2 - Passenger Side Knee Airbag
- With Front Passenger Knee Airbag Igniter -N296-
WARNING
Follow all Safety Precautions when working with pyrotechnic components. Refer to → Chapter "Pyrotechnic Components Safety Precautions".
- Removing and installing. Refer to → Chapter "Passenger Side Knee Airbag with Igniter, Removing and Installing".
3 - Bolt
- 8 Nm
- Replace
4 - Glove Compartment
- Removing and installing. Refer to → Chapter "Glove Compartment, Removing and Installing, with Knee Airbag".
5 - Bolt
- 8 Nm
- Replace
6 - Support
- For knee airbag
7 - Nut
- 8 Nm
- Replace
8 - Nut
- 8 Nm
- With connection for the Ground (GND) cable
