Audi A6 Typ 4G: Radiator Grille, Removing and Installing
Radiator Grille, Removing and Installing, Audi A6/allroad/S6 through MY 2014
Removing
- Remove the front bumper cover. Refer to → Chapter "Bumper Cover, Removing and Installing".
- Remove the molded foam part. Refer to → Chapter "Molded Foam Part, Removing and Installing, Audi A6/S6 through MY 2014".
- Remove the camera for the infrared system mount, if equipped. Refer to → Chapter "Night Vision System Camera -R212- Mount, Removing and Installing, Vehicles through MY 2014".
- If equipped, remove the Garage Door Opener Control Module. Refer to → Electrical Equipment; Rep. Gr.97; Control Modules; Garage Door Opener Control Module, Removing and Installing.
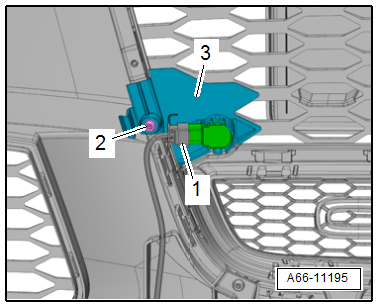
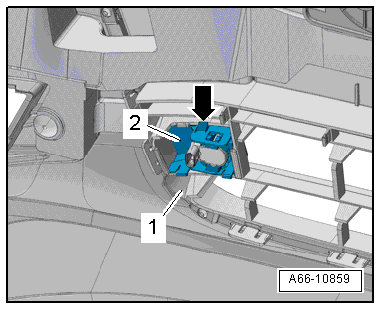
- Disconnect the connectors -1 and 2- from the front parking aid sensor, if equipped.
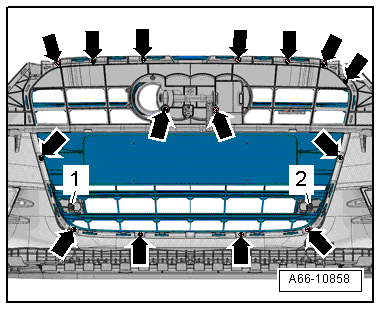
- Remove the bolts -arrows-.
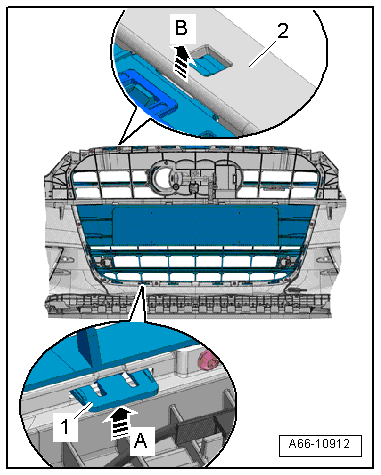
- Open the tabs -1--arrow A- and push the radiator grille forward.
- Release the lock carrier -2--arrow B- and remove the radiator grille forward from the bumper cover.
Installing
Install in reverse order of removal.
Radiator Grille, Removing and Installing, Audi A6 from MY 2015
Removing
- Remove the molded foam part. Refer to → Chapter "Molded Foam Part, Removing and Installing, Audi A6 from MY 2015".
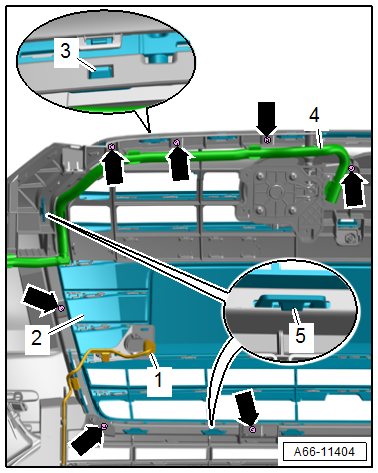
- If equipped, remove the night vision camera washer fluid hose -4- from the spray nozzle and free it up.
- Disconnect the connector -1- from the front parking aid sensor and free up the wiring harness.
- Remove the bolts -arrows-.
- Release the retaining tabs -3- upward in two levels.
- Release the retaining tabs -5- and remove the radiator grille -2- forward from the bumper cover.
Installing
Install in reverse order of removal.
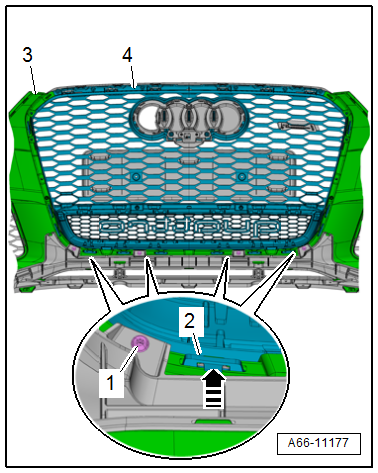
Radiator Grille, Removing and Installing, Audi RS 6
Removing
- Remove the center reinforcement brace. Refer to → Chapter "Center Reinforcement Brace, Removing and Installing, Vehicles through MY 2014".
- Remove the front parking aid sensor mount. Refer to → Chapter "Front Parking Aid Sensor Mount, Removing and Installing, Audi RS 6".
- Remove the bolts -2-.
- Release the tabs -1--arrow- and remove the radiator grille -4- forward from the bumper cover -3-.
Installing
Install in reverse order of removal.
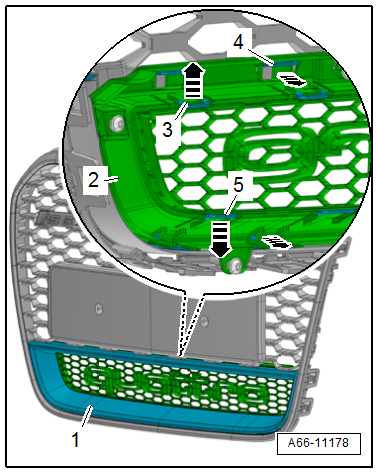
Lower Radiator Grille, Removing and Installing, Audi RS 6
Removing
- Remove the radiator grille. Refer to → Chapter "Radiator Grille, Removing and Installing, Audi RS 6".
- Remove the bolts -arrows-.
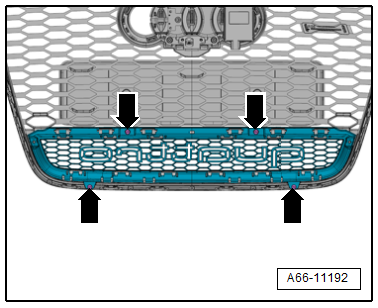
- Release the retaining tabs -3, 4, and 5--arrows-.
- Remove the lower radiator grille -2- inward and at the same time remove the mount -1- forward.
- Remove the lower radiator grill and bracket.
Installing
Install in reverse order of removal.
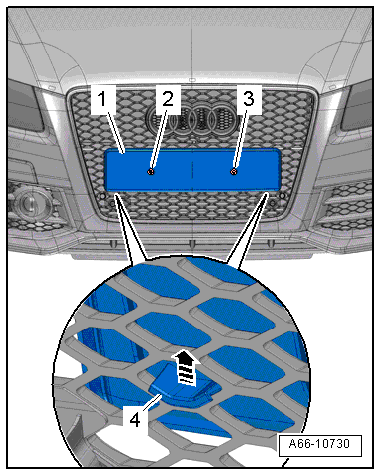
License Plate Bracket, Removing and Installing
Removing
- Remove the license plate.
- Remove the bolts -2- and -3-.
- Detach license plate bracket -1- upward out of the honeycomb-structured grille -arrow- while detaching clips -4-.
- Remove the license plate bracket.
Installing
Install in reverse order of removal. Note the following:
- The license plate bracket must be fully inserted into the honeycomb-structured grille.
Front Parking Aid Sensor Mount, Removing and Installing
Removing
- Remove the front bumper cover. Refer to → Chapter "Bumper Cover, Removing and Installing".
- Release the hooks -arrow- and remove the trim -2- for the parking aid sensor forward from the radiator grille -1-.
- If the mount is replaced, remove the front parking aid sensor. Refer to → Electrical Equipment; Rep. Gr.94; Parking Aid; Front Parking Aid Sensor, Removing and Installing.
Installing
Install in reverse order of removal. Note the following:
- Push the mount into the radiator grille until it clicks into place.
Front Parking Aid Sensor Mount, Removing and Installing, Audi RS 6
Removing
- Remove molded foam part mount. Refer to → Chapter "Molded Foam Part, Removing and Installing, Audi RS 6".
- Disconnect the connector -1-.
- Remove the screw -2- and then remove the mount -3-.
- If the mount is replaced, remove the parking aid sensor. Refer to → Electrical Equipment; Rep. Gr.94; Parking Aid; Front Parking Aid Sensor, Removing and Installing.
Installing
Install in reverse order of removal.