Audi A6 Typ 4G: Rear Lid Tail Lamp, Removing and Installing
Rear Lid Tail Lamp, Removing and Installing, Sedan
Special tools and workshop equipment required
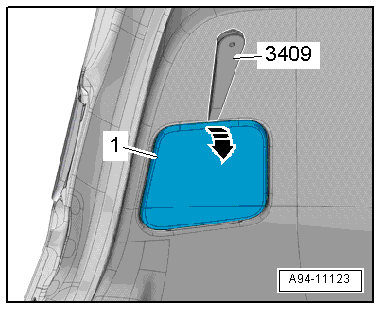
- Trim Removal Wedge -3409-
Removing
- Turn the light switch to position "0".
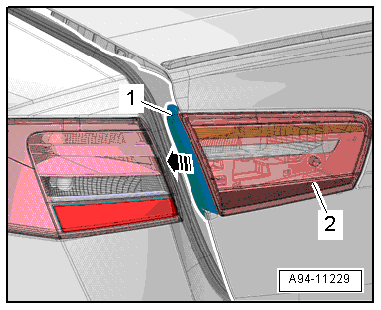
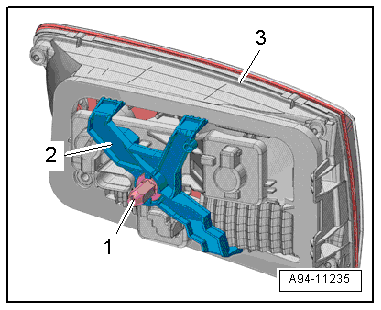
- Remove the cover -1- from the tail lamp -2- in direction of -arrow-.
- Pry off the cover -1- using the Trim Removal Wedge -3409--arrow-.
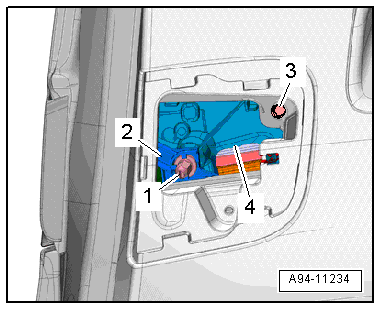
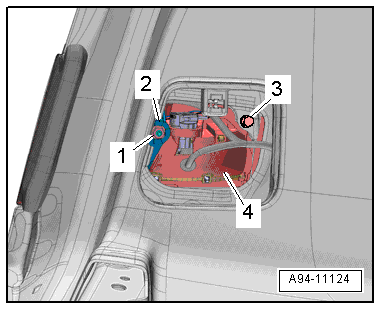
- Remove the screw -4-.
- Remove the nut -2- from the clamping bracket -3-.
- Move the inner tail lamp -1- slightly toward the outside in direction of -arrow B- and remove it from the rear lid in direction of -arrow A-.
- Disconnect the connector.
Installing
Install in reverse order of removal. Note the following:
 Note
Note
Make sure the seal between the body and tail lamp housing seals correctly.
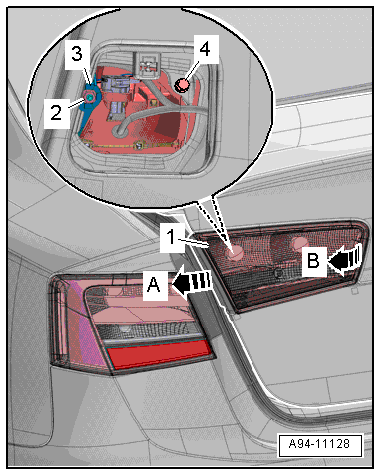
- Push the clamping bracket -3- onto the threaded pin -1- on the inner tail lamp -4-.
- Install the nut -2- just far enough until the threaded pin is flush with the nut.
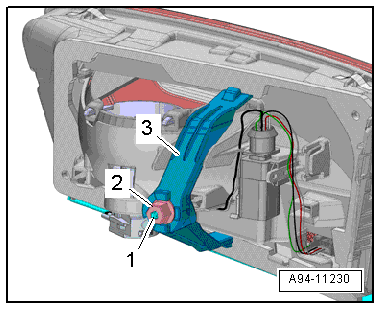
- Position the inner tail lamp -4- on the outer edge of the rear lid.
- Tighten the bolt -3- and the nut -1-.
Note
When tightening the nut, the clamping bracket -2- wedges itself onto the rear lid.
- Press on the cover until it clicks into place.
- Position the cover -1- on the tail lamp assembly -2- and then press on it until it clicks into place.
Note
Ignore -arrow-.
Rear Lid Tail Lamps, Removing and Installing, Avant
Removing
- Turn the light switch to position "0".
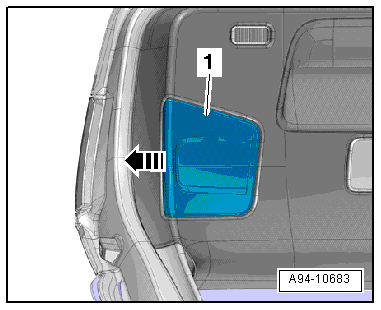
- Pull the cover -1- toward the outside of the vehicle -arrow-.
- Remove the screw -4-.
- Remove the nut -2- from the clamping bracket -3-.
- Move the inner tail lamp -1- slightly toward the outside -arrow B- and remove it from the rear lid in direction of -arrow A-.
- Disconnect the connector.
Installing
Install in reverse order of removal. Note the following:
Note
- Replace the entire inner tail lamp if the LED is faulty.
- Make sure the seal between the body and tail lamp housing seals correctly.

- Slide the clamping bracket -2- onto the threaded pin on the inner tail lamp -3-.
- Turn the nut -1- until it touches and then remove it 5 1/2 turns.
- Position the inner tail lamp -4- on the outer edge of the rear lid.
- Tighten the bolt -3- and the nut -1-.
Note
When tightening the nut, the clamping bracket -2- wedges itself onto the rear lid.
- Press on the cover until it clicks into place.