Audi A6 Typ 4G: Seat Pan Cover and Cushion, Separating
Seat Pan Cover and Cushion, Separating
Special tools and workshop equipment required
- Upholstery Clip Pliers -VAG1634-
Removing
- Remove seat cover with seat cushion for seat pan. Refer to → Chapter "Seat Pan Cover and Cushion, Removing and Installing".
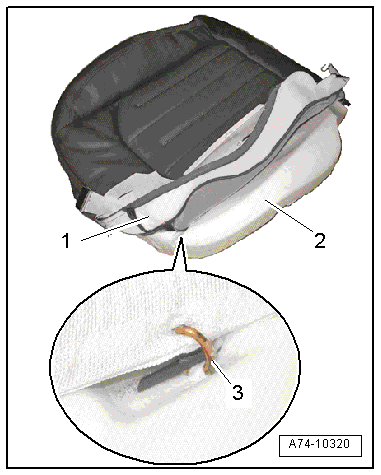
- Remove the seat cover -1- in the rear and side from the seat cushion -2- and cut the upholstery clips -3- using pliers.
Vehicles with Seat Depth Adjuster
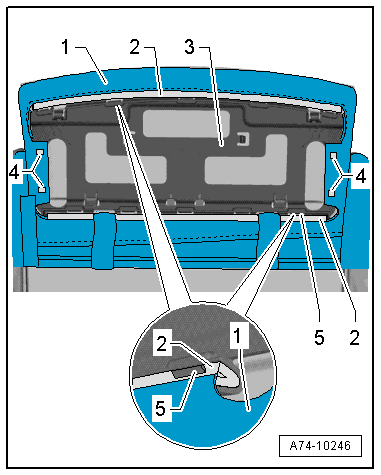
- Remove the retaining channel -2- from the retainers -5-.
- Disengage the seat cover from the retainers -4- on both sides.
- Remove the support -3- with the seat depth adjuster seat cushion from the seat cover -1-.
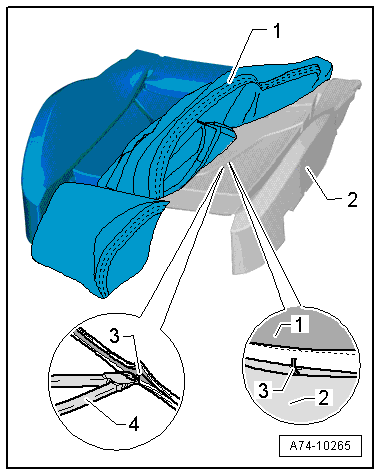
- Remove the seat cover -1- from the seat cushion -2- and cut the upholstery clips -3- using pliers -4-.
Installing
Install in reverse order of removal. Note the following:
Installation notes, for example tightening specifications, replacing components. Refer to → Chapter "Overview - Seat Pan Cover and Cushion, Sport Seat/Super Sport Seat".
Seat Pan Cover and Cushion, Separating, Multi-contour Seat
Special tools and workshop equipment required
- Upholstery Clip Pliers -VAG1634-
Removing
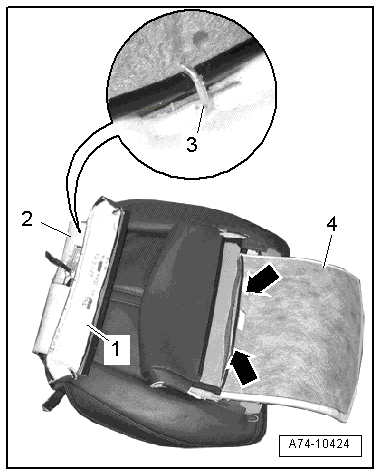
- Remove seat cover and seat cushion. Refer to → Chapter "Seat Pan Cover and Cushion, Removing and Installing, Multi-contour Seat".
- Remove the seat cover -1- from the seat padding -2- and cut the upholstery clips -3- using pliers.
- Cut the electric wires -arrows- between the heating element on the leg support -4- and the seat cover.
 Note
Note
The old heating element remains on the seat cushion and a new heating element (component of the seat cover) is bonded over them.
Installing
Install in reverse order of removal. Note the following:
- Align the new heating element on the leg support.
- Peel the protective film off the heating element. Be careful not to damage the heating element.
- Glue the heating element so that they align with the old heating element and free of wrinkles.
Installation notes, for example tightening specifications, replacing components. Refer to → Chapter "Overview - Seat Pan Cover and Cushion, Multi-contour Seat".