Audi A6 Typ 4G: Sill Panel Trim, Removing and Installing
Special tools and workshop equipment required
- Trim Removal Wedge -3409-
- Wiring Harness Repair Set - Hot Air Blower -VAS 1978/14A-
- Cleaning Solution -D 009 401 04-
Removing
Vehicles with Fiber Optic Cable for Ambient Lighting:
- Remove the front sill panel strip. Refer to → Body Interior; Rep. Gr.70; Passenger Compartment Trim; Sill Panel Strip, Removing and Installing.
- Remove the inner door seal from the body flange only at the bottom near the sill panel strip. Refer to → Chapter "Inner Door Seal, Removing and Installing".
- Disconnect the connector.
Continuation for all Vehicles:
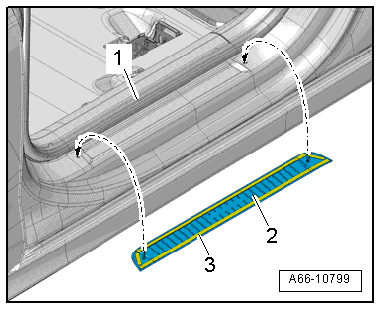
- Carefully warm the sill panel strip -1- using the Hot Air Blower -VAG1416-.
- Carefully pry off the sill panel strip -2- using the Trim Removal Wedge -3409--arrow-.

Installing
Install in reverse order of removal. Note the following:
- Clean the adhesive surface on the vehicle body with Cleaning Solution -D 009 401 04-.
- Remove the protective film from the adhesive tape -3-.
- Place the sill panel strip -2- on the sill panel -1- by pressing the securing tabs in the mounts -arrows-.
- Press the sill panel strip along the entire length of the sill panel.
- Resting time approximately two hours at room temperature
Sill Panel Trim, Removing and Installing
Sill Panel Trim, Removing and Installing
Special tools and workshop equipment required
- Trim Removal Wedge -3409-
- Wiring Harness Repair Set - Hot Air Blower -VAS 1978/14A-
- Cleaning Solution -D 009 401 04-
Removing
- Loosen the rear underbody cover near the sill panel trim. Refer to → Chapter "Rear Vehicle Underbody Cover, Removing and Installing".
- Loosen the center underbody cover near the sill panel trim. Refer to → Chapter "Center Vehicle Underbody Cover, Removing and Installing".
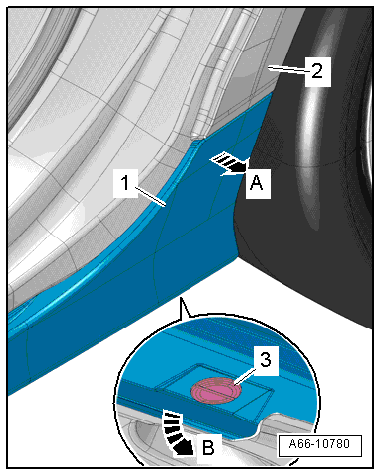
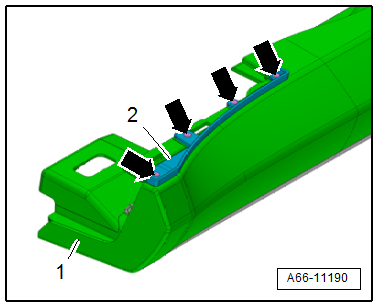
- Warm the sill panel trim -1- near the C-pillar -2- carefully with Hot Air Blower -VAG1416-.
- Pry off the sill panel trim with Trim Removal Wedge -3409--arrow A-.
- Open the quick release -3-.
- Lift the sill panel trim slightly and remove it toward the outside -arrow B-.
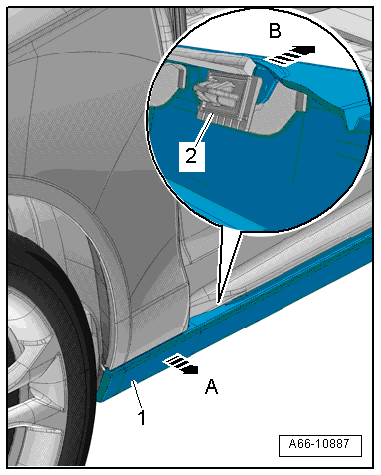
- Pull the sill panel trim -1- off the front bracket -arrow A- and then the rear bracket -2--arrow B-.
- Remove the sill panel trim and lay it on a soft surface.
Installing
Install in reverse order of removal. Note the following:
- Remove the rear bracket for the sill panel trim and set on the sill panel trim. Refer to → Chapter "Rear Bracket for Sill Panel Trim, Removing and Installing"
- Clean the adhesive surface on the vehicle body with Cleaning Solution -D 009 401 04-.
- Remove the protective film from the adhesive tape -2-.
- Set the sill panel trim -1- on the C-pillar and press on.
- The bracket must audibly engage.
Trim Piece for Sill Panel Trim, Removing and Installing
Removing
- Loosen the sill panel trim in the front area. Refer to → Chapter "Sill Panel Trim, Removing and Installing".
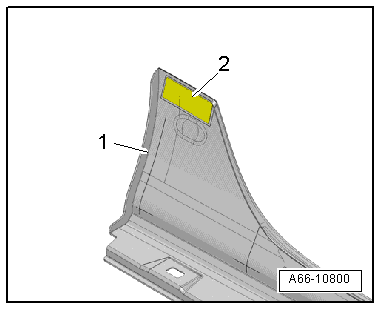
- Loosen the expanding clips -arrows-.
- Remove the trim -2- from the sill panel cover -1-.
Installing
Install in reverse order of removal.
Front Bracket for Sill Panel Trim, Removing and Installing
Removing
- Remove the sill panel trim. Refer to → Chapter "Sill Panel Trim, Removing and Installing".
- Remove the bolt -arrow-.
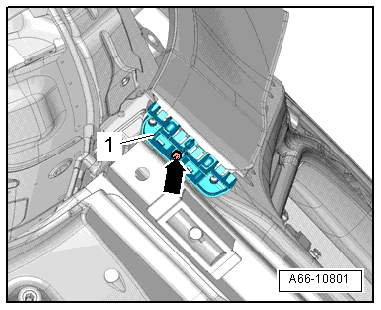
- Remove the front bracket -1- for the sill panel trim.
Installing
Install in reverse order of removal.
Rear Bracket for Sill Panel Trim, Removing and Installing
Removing
- Remove the sill panel trim. Refer to → Chapter "Sill Panel Trim, Removing and Installing".
- Release the tabs -arrows- with a narrow screwdriver -2- and remove the rear bracket -1- toward the outside at the same time.
- Remove the rear bracket for the sill panel trim.
Installing
Install in reverse order of removal. Note the following:
 Note
Note
Replace damaged bracket.
- Insert the rear bracket into the sill panel trim.

Front and Rear Quick Release Mount, Removing and Installing
Removing
- Remove the sill panel trim. Refer to → Chapter "Sill Panel Trim, Removing and Installing".
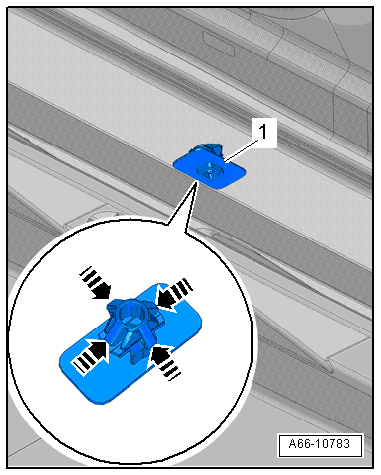
- Release the tabs -arrows- with a narrow screwdriver.
- Remove the mount -1- downward.
Installing
Install in reverse order of removal. Note the following:
- Push on the mount for the quick release until it clicks into place.
Drip Rail, Removing and Installing
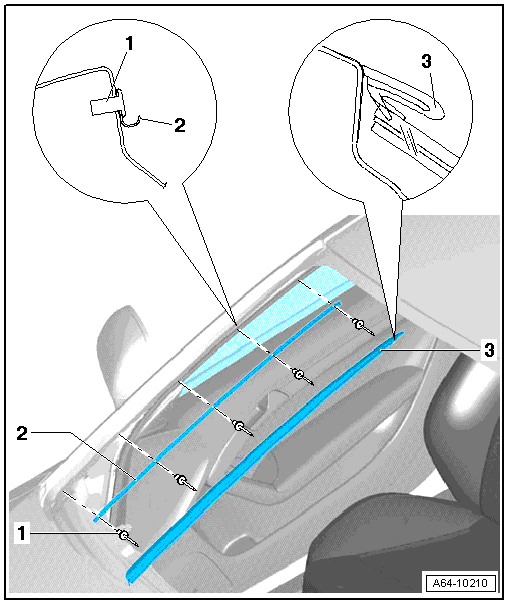
1 - Blind Rivet
- Quantity: 5
- Rivet the guide rails beginning at the top.
2 - Guide Rail
- To remove, drill out rivet heads -4- and drive out rivet shafts.
3 - Drip Rail
- Press into the guide rail as far as the stop, beginning at the top and working toward the bottom.
- Make sure the transition to the A-pillar is flush.
