Audi A6 Typ 4G: Sunroof Panel, Removing and Installing
Sunroof Panel, Removing and Installing
Procedure
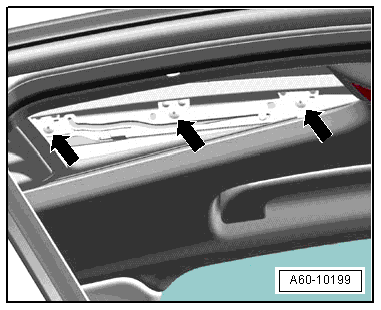
- Remove the bellow laterally from the sunroof panel and the frame.
- Remove the screws -arrows- on both side and remove the sunroof panel.
Boot, Removing and Installing
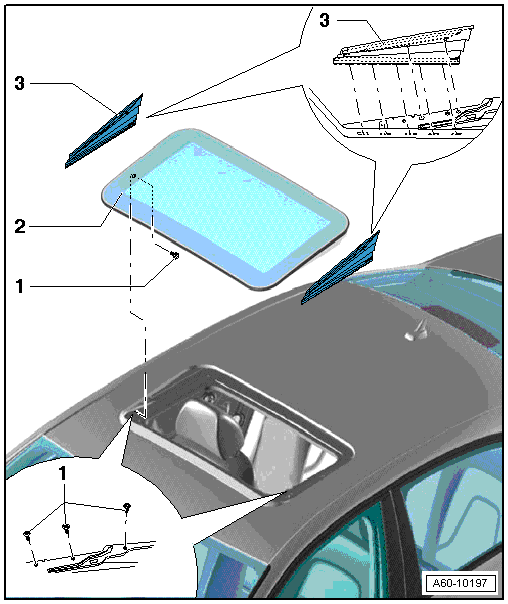
1 - Bolt
- 4 Nm
2 - Sunroof Panel
- Removing. Refer to → Chapter "Sunroof Panel, Removing and Installing".
3 - Boot
- Remove laterally from the sunroof panel and the frame.
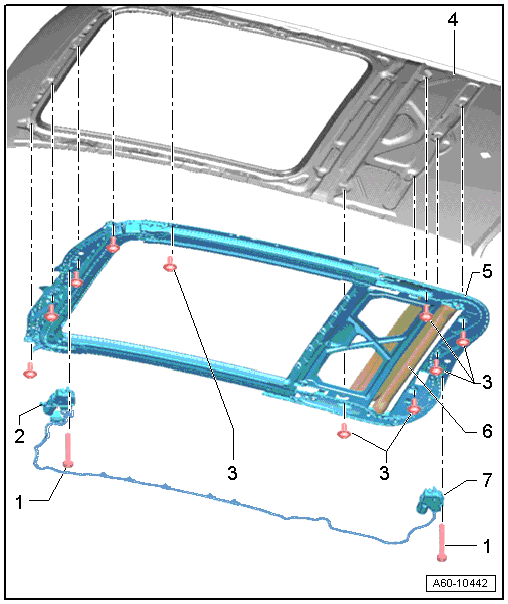
Sunroof Frame, Removing and Installing
Sunroof Frame, Removing and Installing, Sedan
 Caution
It is necessary to code or program the mechanical components or control modules on the Panorama sunroof after removing and installing them using Guided Functions in Guided Fault Finding under diagnostic address 46. Refer to Vehicle Diagnostic Tester.
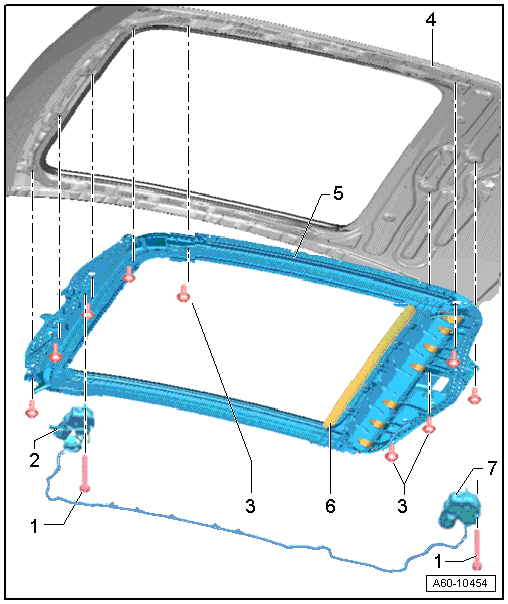
1 - Bolt
- 3 Nm
2 - Power Sunroof Control Module -J245-
- Performing the adaptation procedure. Refer to → Chapter "Motor Adaptation".
3 - Bolt
- 8 Nm
4 - Roof
5 - Panorama Sunroof Frame
- Removing:
- Move the front seat backrests to the rear.
- Only lower the headliner. Refer to → Body Interior; Rep. Gr.70; Roof Trim Panels; Headliner, Removing and Installing.
- Disconnect electrical connectors.
- Remove the front and rear water drain hoses.
 Note
Note
- The side and center screws on the frame remain mounted until the end.
- Two technicians must hold the frame before the screws can be removed and the frame removed.
- Remove the screws up the left and right center screws.
- Holding the frame with a second technician, first loosen the center bolts and then lift the frame out through the opening in the roof.
- Installing:
- Secure the frame with the screws.
- Disconnect the frame at the securing holes with a 8 mm drill diameter at the front and rear.
- Tighten the screws first at the front and then at the rear to the tightening specification.
- Tighten the screws longitudinally alternating from rear to front to the tightening specification.
- Install the front and rear water drain hoses.
6 - Sun Shade
- Removing. Refer to → Chapter "Sunroof Shade, Removing and Installing".
7 - Roof Shade Control Module -J394-
- Performing the adaptation procedure. Refer to → Chapter "Motor Adaptation".
Sunroof Frame, Removing and Installing, Avant
1 - Bolt
- 3 Nm
2 - Power Sunroof Control Module -J245-
- Performing the adaptation procedure. Refer to → Chapter "Motor Adaptation".
3 - Bolt
- 8 Nm
4 - Roof
5 - Panorama Sunroof Frame
- Removing
- Lower the headliner. Refer to → Body Interior; Rep. Gr.70; Roof Trim Panels; Headliner, Removing and Installing.
- Disconnect electrical connectors.
- Remove the front and rear water drain hoses.
Note
- The side and center screws on the frame remain mounted until the end.
- Two technicians must hold the frame before the screws can be removed and the frame removed.
- Remove the screws up the left and right center screws.
- With the other technicians holding the frame, first remove the center screws and lift the frame through the rear lid and out of the vehicle.
- Installing
- Secure the frame with the screws.
- Disconnect the frame at the securing holes with a 10 mm drill diameter at the front and rear.
- Tighten the screws first at the front and then at the rear to the tightening specification.
- Tighten the screws longitudinally alternating from rear to front to the tightening specification.
- Install the front and rear water drain hoses.
6 - Sun Shade
- Removing. Refer to → Chapter "Sunroof Shade, Removing and Installing".
7 - Roof Shade Control Module -J394-
- Performing the adaptation procedure. Refer to → Chapter "Motor Adaptation".
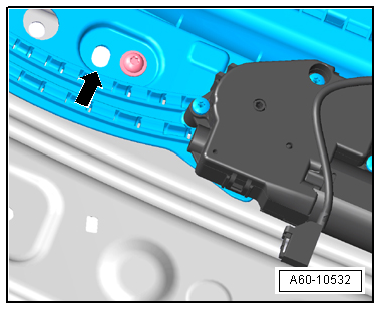
Attaching Points for the Frame
- Insert a 10 mm drill bit in the left front longitudinal holes -arrow- next to the Power Sunroof Control Module -J245- and...
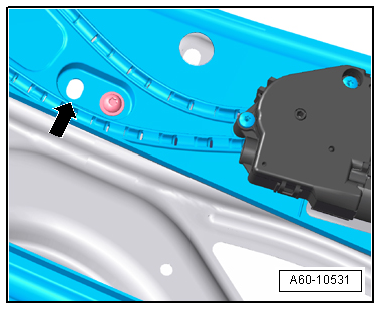
- ...in the left rear longitudinal hole -arrow- next to the Roof Shade Control Module - J394-.
- Tighten the screws first at the front and then at the rear to the tightening specification.
- Tighten the screws longitudinally alternating from rear to front to the tightening specification.