Audi A6 Typ 4G: Windshield Washer Fluid Reservoir, Removing and Installing
Washer Fluid Reservoir Filler Tube, Removing and Installing
Special tools and workshop equipment required
- Drip Tray
Removing
- Place a drip tray under the windshield washer fluid reservoir.
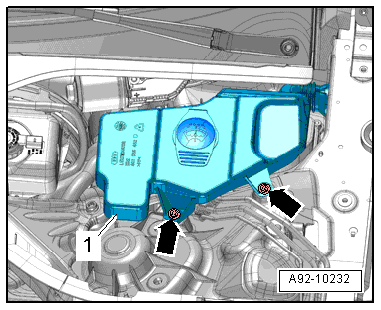
- Remove the plenum chamber cover. Refer to → Body Exterior; Rep. Gr.50; Bulkhead; Plenum Chamber Cover, Removing and Installing.
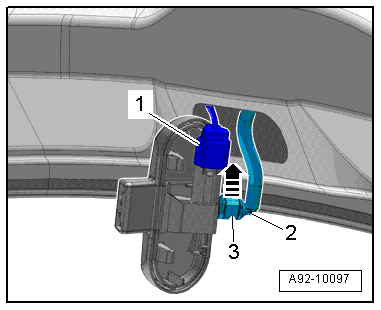
- Remove the screws -arrows- and remove the connection -1- with the filler tube from the windshield washer fluid reservoir to the right side through the opening in the body.
Installing
Install in reverse order of removal. Note the following:
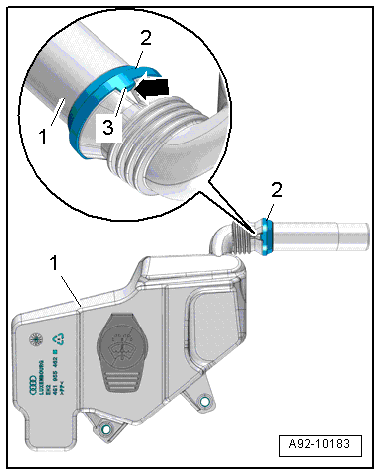
- Slide the grommet -2- all the way onto the filler tube connection -1-.
- The tab -3- must fit into the opening -arrow- on the filler tube.
- Insert the filler connection into the windshield washer fluid reservoir.
 Note
Note
Make sure the O-ring is not crushed when sliding it into the washer fluid reservoir.
Windshield Washer Fluid Reservoir, Removing and Installing
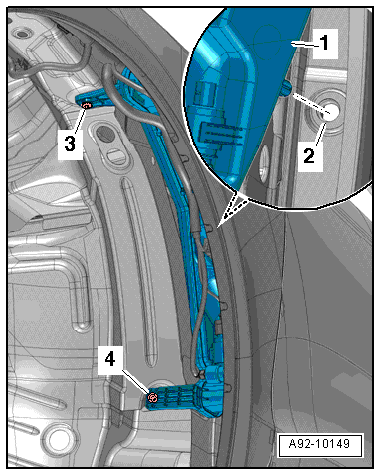
Removing
- Remove the washer fluid reservoir filler neck. Refer to → Chapter "Washer Fluid Reservoir Filler Tube, Removing and Installing".
- Remove the left front wheel housing liner. Refer to → Body Exterior; Rep. Gr.66; Wheel Housing Liner; Front Wheel Housing Liner, Removing and Installing.
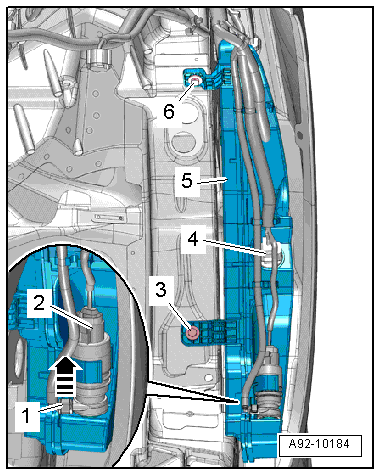
- Open the clip in direction of -arrow- and remove the windshield washer fluid hose -1- from the windshield washer pump.
- Disconnect the connectors -2 and 4-.
- Remove the wiring harness -5- and the windshield washer fluid hose from the mounts on the windshield washer fluid reservoir.
- Remove the bolts -3 and 6-.
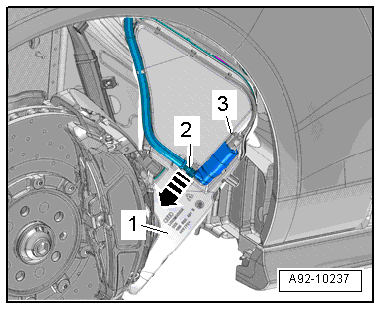
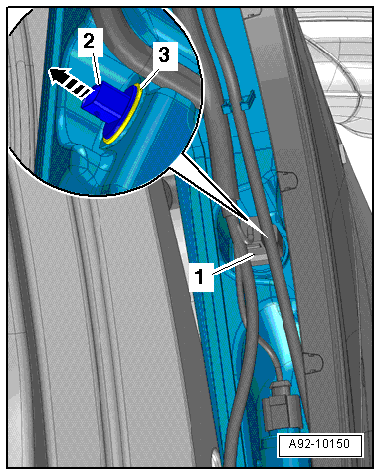
- Swivel the lower windshield washer fluid reservoir forward just a little.
- Disconnect the connector -3-.
- Open the clip in direction of -arrow- and remove the washer fluid hose -2- for the headlamp washer system from the hose coupling.
- Remove the washer fluid reservoir -1-.
Installing
Install in reverse order of removal. Note the following:
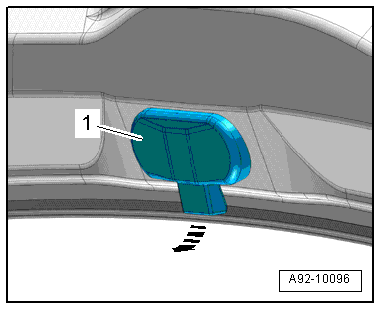
- When inserting the washer fluid reservoir, make sure the securing tab -1- engages in the mount -2- on the fender end plate.
Windshield Washer Fluid Level Sensor, Removing and Installing
Special tools and workshop equipment required
- Drip Tray
Removing
- Remove the left front wheel housing liner. Refer to → Body Exterior; Rep. Gr.66; Wheel Housing Liner; Front Wheel Housing Liner, Removing and Installing.
- Place a drip tray under the windshield washer fluid reservoir.
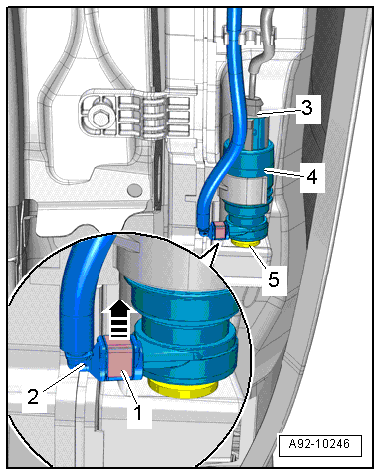
- Disconnect the connector -1-.
- Remove the Windshield Washer Fluid Level Sensor -G33--item 2- from the washer fluid reservoir.
Installing
Install in reverse order of removal. Note the following:
- Check the sealing grommet -3- for damage.
Windshield Washer Pump, Removing and Installing
Special tools and workshop equipment required
- Drip Tray
Removing
- Remove the left front wheel housing liner. Refer to → Body Exterior; Rep. Gr.66; Wheel Housing Liner; Front Wheel Housing Liner, Removing and Installing.
- Disconnect the connector -3-.
- Place a drip tray under the windshield washer fluid reservoir.
- Open the clip -1- in direction of -arrow- and disconnect the windshield washer fluid hose -2- from the windshield washer pump.
- Remove the Windshield Washer Pump -V5--item 4- upward out of the washer fluid reservoir.
Installing
Install in reverse order of removal. Note the following:
- Check the sealing grommet -5- for damage.
Spray Nozzles, Removing and Installing
Removing
- Unclip the spray nozzle -1- for the windshield washer system from the hood in direction of -arrow-.
- Open the clip -3- in direction of -arrow- and disconnect the windshield washer fluid hose -2- from the windshield washer spray nozzle.
- Disconnect the connector -1-, if equipped.
Installing
Install in reverse order of removal. Note the following:
- When connecting the washer fluid line, ensure that the securing clip engages audibly into the washer fluid line connection.
- Install the windshield washer spray nozzle into the hood.
Spray Nozzles, Adjusting
Adjusting spray nozzles for windshield washer system.
- If the spray field does not correspond to the specifications, clean dirty spray jet.
Cleaning the nozzle:
 Caution
Risk of damage.
Do not use any objects to clean the spray nozzles!
- Remove the spray nozzle. Refer to → Chapter "Spray Nozzles, Removing and Installing".
- Rinse the spray nozzle with clean water opposite the spray direction.
- To remove any remaining impurities, the nozzle must only be blown out opposite to spray direction using compressed air.
- If the spray field still does not correspond to the specifications, replace the spray nozzle.
