Audi A6 Typ 4G: Cable Mount, Removing and Installing
 WARNING
Danger of causing injury to the legs.
Keep a safe distance from the swivel range of the ball head when unlocking the trailer hitch.
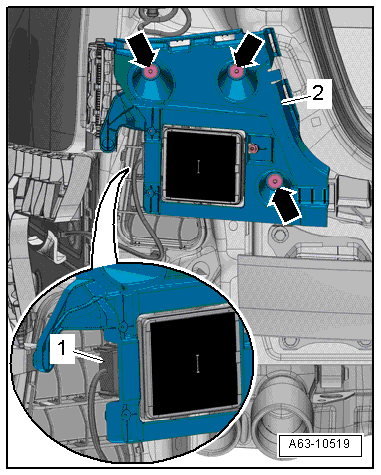
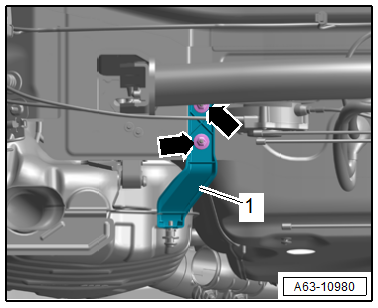
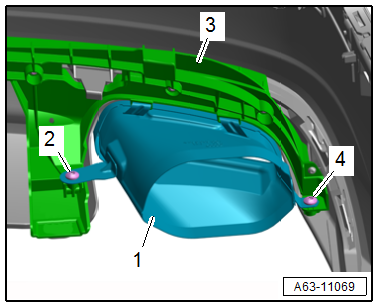
Removing
- Remove the luggage compartment side trim panel. Refer to → Body Interior; Rep. Gr.70; Luggage Compartment Trim Panels; Luggage Compartment Side Trim Panel, Removing and Installing.
- Pull the pull knob -6- on the mount -3- and pry off the clamp -5- with a narrow screwdriver -arrow-.
- Remove the cable -4- from the pull knob.
- Remove the bolts -1, 2 and 7-.
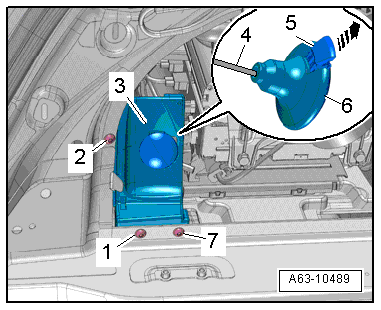
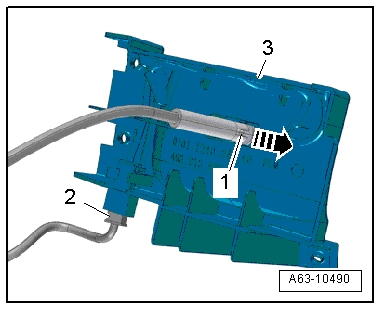
- Remove the cable bracket -1- from the mount -3--arrow-.
- Disconnect the connector -2- and remove the mount.
Installing
Install in reverse order of removal.
Impact Member, Removing and Installing
Impact Member, Removing and Installing, Vehicles without Trailer Hitch, Audi A6/allroad/S6
Removing
- Remove the rear bumper cover. Refer to → Chapter "Bumper Cover, Removing and Installing, Vehicles through MY 2014".
- If equipped, remove the spare tire well trim. Refer to → Body Interior; Rep. Gr.70; Luggage Compartment Trim Panels; Spare Wheel Well Trim, Removing and Installing.
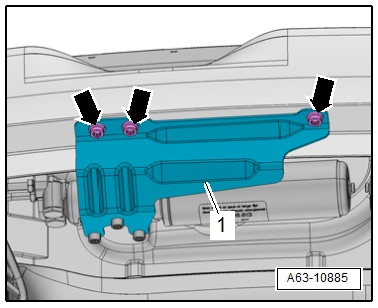
- Remove the nut -2- and bolts -1, 4 and 5-.
- Remove the impact member -3-.
Installing
Install in reverse order of removal. Note the following:
 Note
Note
Replace the nuts that are tightened with an additional turn.
Impact Member, Removing and Installing, Audi RS 6
Removing
- Remove the molded foam part. Refer to → Chapter "Molded Foam Piece, Removing and Installing".
- Remove the bumper cover outer mount. Refer to → Chapter "Bumper Cover Mount, Removing and Installing, Audi RS 6".
- Remove the bolts -arrows-.
- Tie up the bracket -1- with the central valve to the side.
- Remove the spare tire well trim. Refer to → Body Interior; Rep. Gr.70; Luggage Compartment Trim Panels; Spare Wheel Well Trim, Removing and Installing.
- Remove the nut -2- and bolts -1, 4 and 5-.
- Remove the impact member -3-.
Installing
Install in reverse order of removal. Note the following:
Note
Replace the nuts that are tightened with an additional turn.
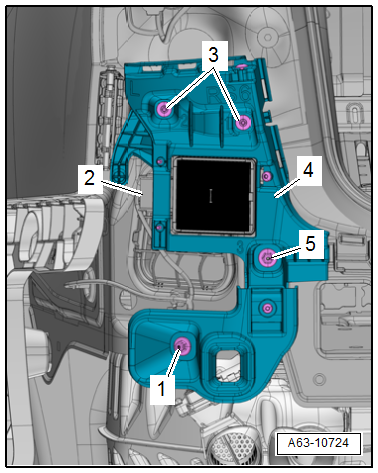
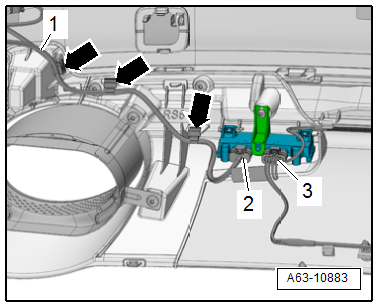
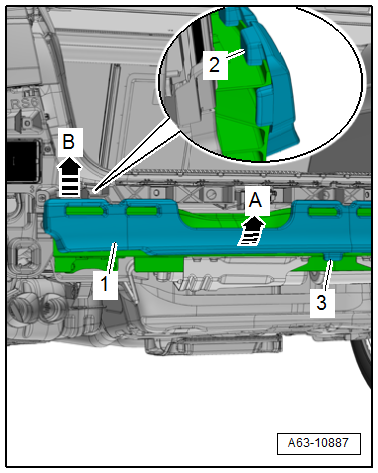
Impact Absorber, Removing and Installing, Vehicles with Trailer Hitch
Removing
- Remove the cable mount. Refer to → Chapter "Cable Mount, Removing and Installing".
- Remove the rear bumper cover. Refer to → Chapter "Bumper Cover, Removing and Installing, Vehicles through MY 2014".
- If equipped, remove the spare tire well trim. Refer to → Body Interior; Rep. Gr.70; Luggage Compartment Trim Panels; Spare Wheel Well Trim, Removing and Installing.
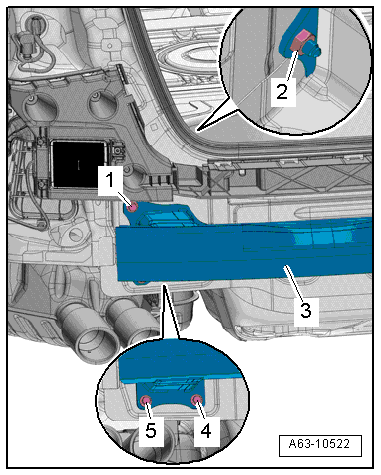
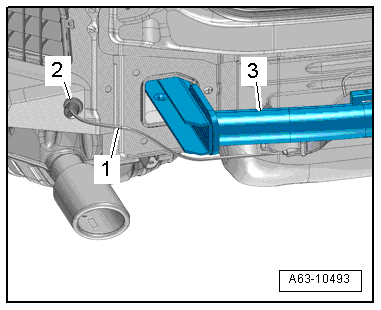
- Disconnect the connector -1- and remove the mount -2-.
- Press the grommet -3- outward.
- Remove the bolts -arrows-.
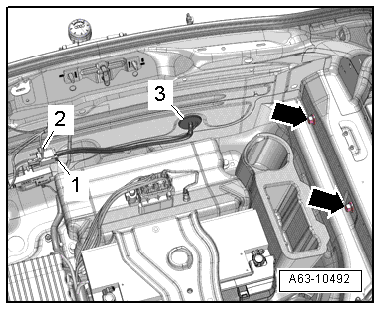
- Remove the impact member -3- with a second technician.
- Remove the grommet -2- and the cable -1-.
Installing
Install in reverse order of removal and note the following:
Note
After installing a new impact member the locking pin on the cable coupling must be remove and the hole must be sealed with the supplied self-adhesive protective film.
 Caution
The bolts that have been tightened to the torque must be replaced.
- Tightening specification. Refer to → Fig. "Impact Member with Trailer Hitch - Tightening Specification and Sequence".
- Install the trailer hitch socket. Refer to →Electrical Equipment General Information; Rep. Gr.96.
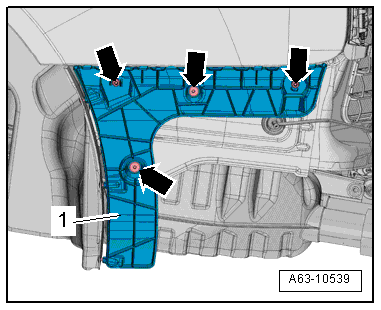
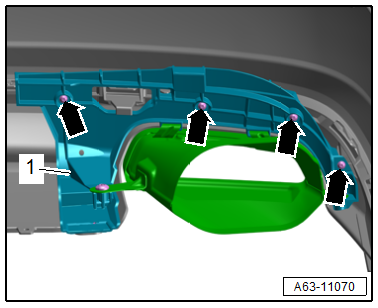
Attachments, Removing and Installing
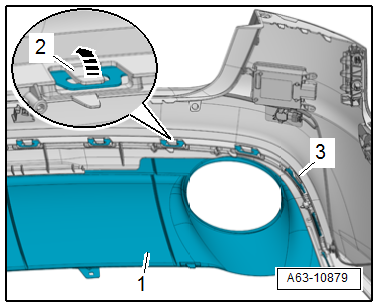
Bumper Cover Mount, Removing and Installing, Audi A6/S6
Removing
- Remove the rear bumper cover. Refer to → Chapter "Bumper Cover, Removing and Installing, Vehicles through MY 2014".
- Disconnect the connector -1-, if equipped.
- Remove the bolts -arrows- and the front bumper cover outer mount -2-.
Note
Depending on the vehicle version instead of the lower bolt a nut may be installed.
Installing
Install in reverse order of removal. Note the following:
- If the vehicle has lane change assistance, the lane change assistance control module -J769-/-J770- must be recalibrated. Refer to → Electrical Equipment; Rep. Gr.96; Lane Change Assistance; Lane Change Assistance, Calibrating.
Bumper Cover Mount, Removing and Installing, Audi RS 6
Removing
- Remove the rear bumper cover. Refer to → Chapter "Bumper Cover, Removing and Installing, Vehicles through MY 2014".
- Disconnect the connector -2-, if equipped.
- Remove the bolts -3- and nuts -1 and 5- and remove the outer mount -4- for the bumper cover.
Installing
Install in reverse order of removal. Note the following:
- If the vehicle has lane change assistance, the lane change assistance control module -J769-/-J770- must be recalibrated. Refer to → Electrical Equipment; Rep. Gr.96; Lane Change Assistance; Lane Change Assistance, Calibrating.
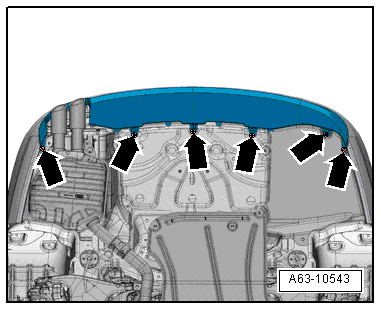
Upper Bumper Cover Mount, Removing and Installing
Removing
- Remove the rear bumper cover. Refer to → Chapter "Bumper Cover, Removing and Installing, Vehicles through MY 2014".
- Remove the bumper cover outer mount. Refer to → Chapter "Attachments, Removing and Installing".
- Remove the bolts -1 and 3- and the front bumper cover upper mount -2-.
Installing
Install in reverse order of removal.
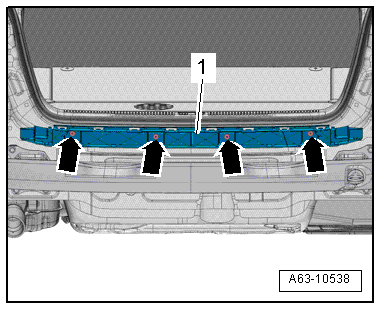
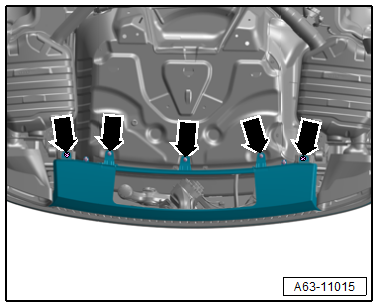
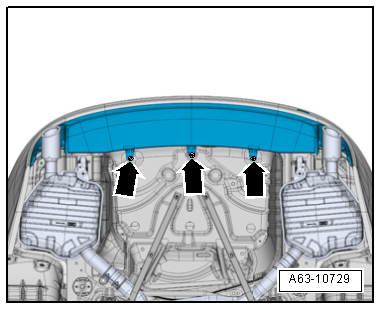
Center Bumper Cover Mount, Removing and Installing
Removing
- Remove the rear bumper cover. Refer to → Chapter "Bumper Cover, Removing and Installing, Vehicles through MY 2014".
- Remove the bumper cover outer mount. Refer to → Chapter "Attachments, Removing and Installing".
- Remove the bolts -arrows-.
- Remove the center mount -1-.
Installing
Install in reverse order of removal.
Tightening Specifications
- Vehicles through MY 2014. Refer to → Fig. "Bumper Cover Center Mount - Tightening Specification and Sequence"
- Vehicles from MY 2015. Refer to → Fig. "Bumper Cover Center Mount - Tightening Specification and Sequence"
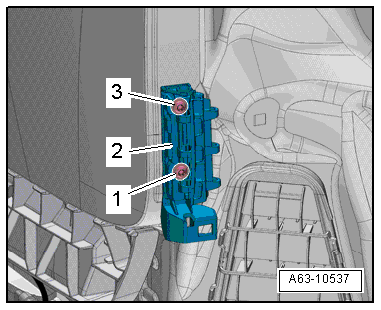
Rear Bumper Cover Mount, Removing and Installing
Removing
- Remove the rear bumper cover. Refer to → Chapter "Bumper Cover, Removing and Installing, Vehicles through MY 2014".
- Remove the nuts -1 and 2-.
- Remove rear mount -3-.
Installing
Install in reverse order of removal.
Bumper Cover Side Mount, Removing and Installing
Removing
- Remove the rear bumper cover. Refer to → Chapter "Bumper Cover, Removing and Installing, Vehicles through MY 2014".
- Remove the bolts -arrows-.
- Remove the bumper cover mount -1-.
Installing
Install in reverse order of removal.
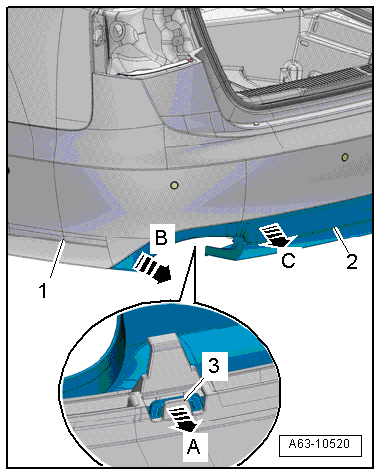
Bumper Cover Lower Section, Removing and Installing, Audi A6
Removing
- Vehicles through MY 2014: Remove the bolts -arrows- on the bumper cover lower section.
- Vehicles from MY 2015: Remove the bolts -arrows- on the bumper cover lower section.
- Carefully release the tab -3- in direction of -arrow A- and remove clips from the bumper cover -1- by simultaneously pulling on the lower section -2-.
- Unlock the lower section of the bumper cover from the outside -arrow B- to the center of the vehicle -arrow C-.
Installing
Install in reverse order of removal. Note the following:
- Push the lower section into the bumper cover until it clicks into place.
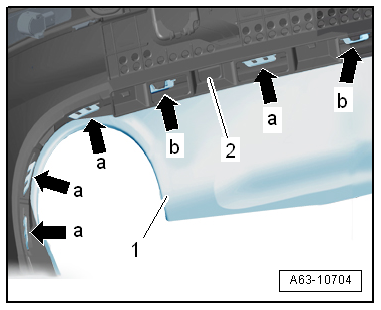
Bumper Cover Lower Section, Removing and Installing, Audi allroad
Removing
- Remove the bumper cover. Refer to → Chapter "Bumper Cover, Removing and Installing, Vehicles through MY 2014".
- Bend the metal tabs -arrows a- on the bumper cover.
- Releases the retainers -arrows b- one after the other and then remove the lower section from the bumper cover.
Installing
Install in reverse order of removal. Note the following:
- Clip the lower section into the bumper cover. The clip must click into place.
- Bend the metal tabs behind the bumper cover.
Bumper Cover Lower Section, Removing and Installing, Audi RS 6
Removing
- Remove the mount for the tail pipe trim. Refer to → Chapter "Tail Pipe Trim Mount, Removing and Installing, Audi RS 6".
- For vehicles with an automatic rear lid opener, disconnect the connector -1-.
- Cut the cable tie -2-.
- Remove the power rear lid opener sensor -3 and 4- from the clips -arrows-.
- Release the tab -2--arrow- while removing the lower section -1- from the bumper cover -3- at the same time.
Installing
Install in reverse order of removal. Note the following:
- Push the lower section into the bumper cover until it clicks into place.
Trim Molding for Bumper Lower Section, Removing and Installing
Removing
- Remove the bolts -arrows- from the bumper cover lower section.
- Remove the bolts -3-.
- Remove the trim molding -1- forward from lower section of the bumper cover -2--arrow-.
Installing
Install in reverse order of removal.
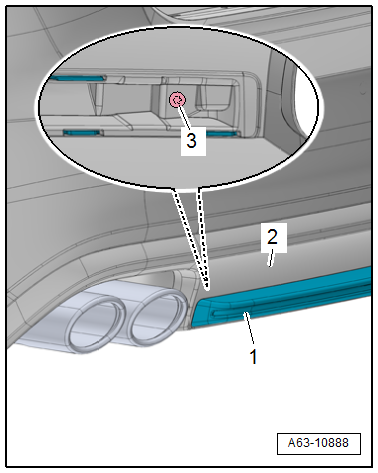
Tail Pipe Trim, Removing and Installing, Audi RS 6
Removing
- Remove the rear bumper cover. Refer to → Chapter "Bumper Cover, Removing and Installing, Vehicles through MY 2014".
- Remove the bolts -arrows-.
- Remove the tail pipe trim -1- inward from the bumper cover.
Installing
Install in reverse order of removal. Note the following:
- Check the trim distance for the tail pipe -2- on the bumper cover -1-:
- Dimension -x- = uniform gap.
Tail Pipe Trim, Removing and Installing from MY 2015
Removing
- Remove the rear bumper cover. Refer to → Chapter "Bumper Cover, Removing and Installing, Vehicles through MY 2014".
- Remove the bolts -2 and 4-.
- Remove the tail pipe trim -1- inward from the mount -3-.
Installing
Install in reverse order of removal.
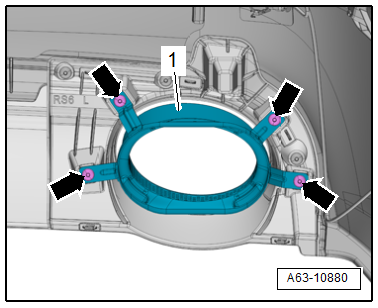
Tail Pipe Trim Mount, Removing and Installing, Audi RS 6
Removing
- Remove the rear bumper cover. Refer to → Chapter "Bumper Cover, Removing and Installing, Vehicles through MY 2014".
- Right: for vehicles with an automatic rear lid opener, disconnect connectors -2 and 3-
- Free up the wiring harness -1-.
- Remove the clips -arrows- from the guide with a screwdriver.
- Remove the bolts -1, 2 and 4-.
- Remove the mount -3- from the bumper cover.
Installing
Install in reverse order of removal.
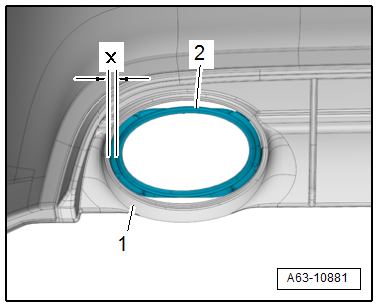
Tail Pipe Trim Mount, Removing and Installing from MY 2015
Removing
- Remove the rear bumper cover. Refer to → Chapter "Bumper Cover, Removing and Installing, Vehicles through MY 2014".
- Remove the bolts -arrows-.
- Remove the mount -1- from the bumper cover.
Installing
Install in reverse order of removal.
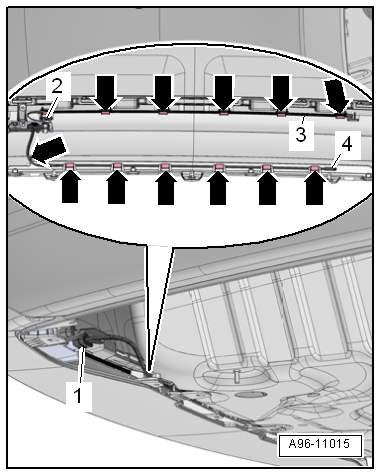
Molded Foam Piece, Removing and Installing
Removing
- Remove the rear bumper cover. Refer to → Chapter "Bumper Cover, Removing and Installing, Vehicles through MY 2014".
- Release the lower retainer -3- in the -direction of arrow A- and remove molded foam piece -1- upward -arrow B-, while doing this the upper retaining tabs -2- release.
Installing
Install in reverse order of removal.
Special Tools
Special tools and workshop equipment required
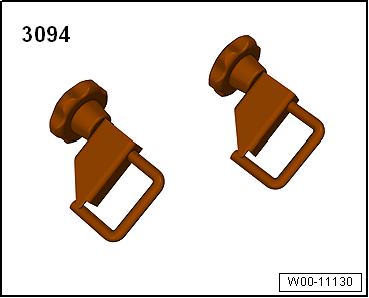
- Hose Clamps - Up To 25 mm -3094-
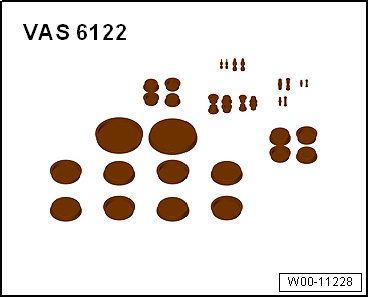
- Engine Bung Set -VAS 6122-
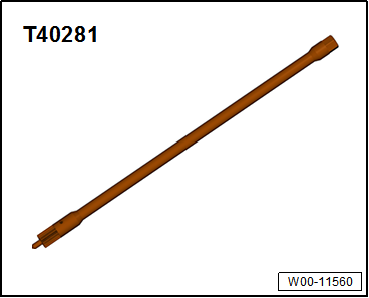
- Adjusting Tool -T40281-
- Drill
- Drill 5 mm diameter