Audi A6 Typ 4G: Hood, Removing and Installing
Hood Impact Guard, Replacing
 Note
Note
The impact guard is also equipped with double-sided adhesive tape.
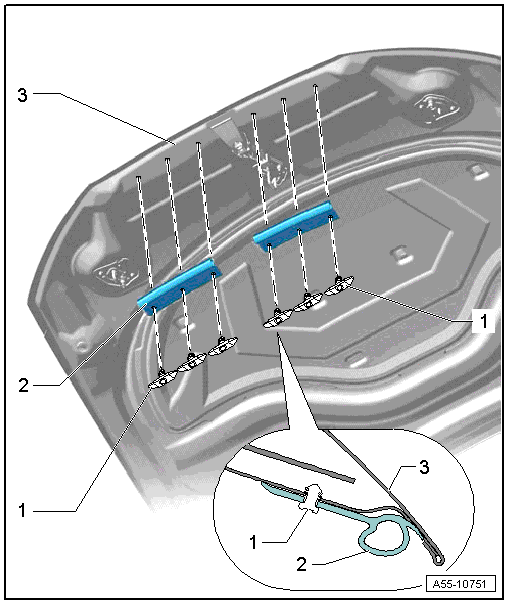
1 - Clip
2 - Impact Guard
- To remove, remove the clip from the hood and then remove the impact
guard.
3 - Door
Hood Seal, Removing and Installing
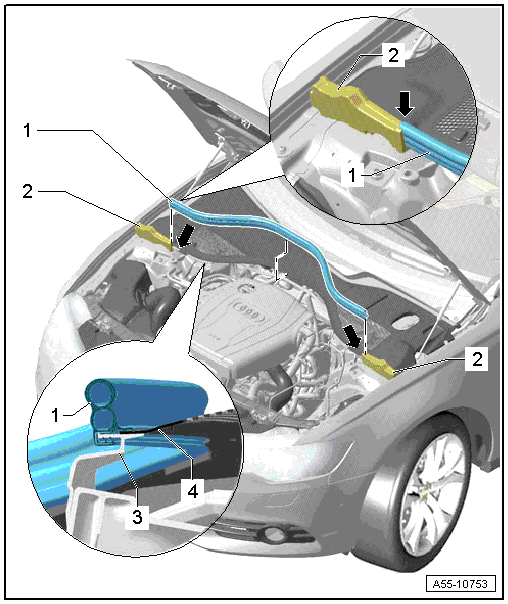
1 - Gasket for Plenum Chamber
- To remove, pull forward off the body flange.
- Mount the seal on the foam piece and then push it onto the flange on
the body.
- Mount the seal on the opposite side on the foam piece and push it
onto the flange on the body.
- Press the seal on the opposite side on the flange on the body using
up any overlap.
2 - Right Sealing Profile
- To remove, unclip it from the fender flange and the suspension strut
tower.
- Press the clips on the foam piece into the body when installing.
3 - Plenum Chamber Bulkhead
- Slide the plenum chamber seal on at the sides.
READ NEXT:
Special tools and workshop equipment
required
Gauge - Gap Adjustment -3371-
Gap Dimensions for Hood
Note
All dimensions are in mm with a +- 0.5 mm tolerance.
Dimension -A- = 4.5 mm
Di
Removing
- Disconnect the connector -4-
from the anti-theft alarm system.
- Disconnect the connector from the lock carrier.
- Free up the release cable -1-
by removing the clamps.
-&n
Hood Hook, Removing and Installing
Removing
- Remove the nuts -1- and the
hood catch -2-.
Installing
Install in reverse order of removal.
Lock Carrier Hook, Removing and Installing
Removing
-&n
SEE MORE:
Input Shaft
Input Shaft Ball Bearing, Replacing
Special tools and workshop equipment
required
Press Plate -VW401-
Press Plate -VW402-
Press Piece - Multiple Use -VW412-
Press Piece - 60mm - VW415A-
Puller -3046-
Removing
- Remove the dual clutch -1-.
Refer to
→ Chapter "DSG Clu
Hill Start, System Description
The vehicle may be equipped with hill start depending on the
model.
Function
The function assists the driver if the vehicle must stop
frequently or for long periods of time while the engine is
running.
The hill start holds the vehicle after the vehicle has been
sta
