Audi A6 Typ 4G: Instrument Panel Side Cover, Removing and Installing
Special tools and workshop equipment required
- Trim Removal Wedge -3409-
Removing
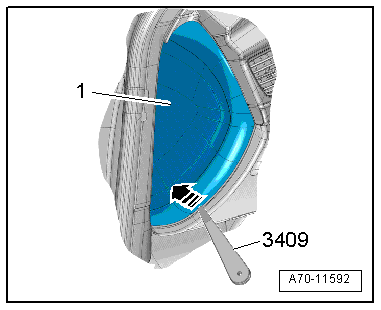
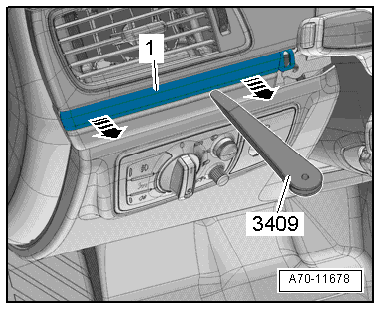
- Pry the instrument panel side cover -1- off using the Trim Removal Wedge -3409--arrow- and remove it.
Installing
Install in reverse order of removal. Note the following:
Installation notes, for example tightening specifications, replacing components. Refer to → Chapter "Overview - Instrument Panel".
Instrument Panel Cover, Removing and Installing
Instrument Panel Rear Cover, Removing and Installing
Special tools and workshop equipment required
- Wedge Set -T10383-
Removing
Driver Side Cover
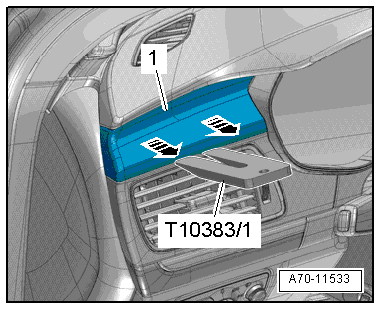
- Unclip the cover -1- using the Wedge Set -T10383/1--arrows- and remove it.
Center Cover
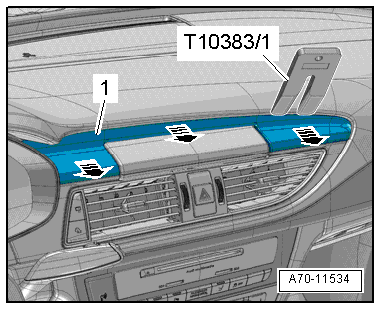
- Carefully unclip the cover -1- for the Front Information Display Control Head -J685- using the Wedge Set -T10383/1--arrows- and remove it.
Installing
Install in reverse order of removal. Note the following:
Installation notes, for example tightening specifications, replacing components. Refer to → Chapter "Overview - Instrument Panel".
Instrument Panel Upper Cover, Removing and Installing
Special tools and workshop equipment required
- Trim Removal Wedge -3409-
- Wedge Set -T10383-
Removing
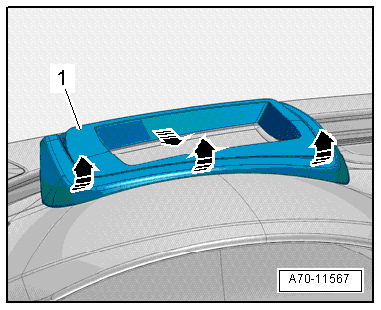
- Vehicle versions with windshield projection (head up display): unclip the cover -1- from the instrument panel -arrows- using the Trim Removal Wedge -3409-.
- Swivel the cover upward and remove it from the instrument panel.
- Remove the upper A-pillar trim panel. Refer to → Chapter "A-Pillar Trim Panel, Removing and Installing".
- Remove the Sunlight Photo Sensor -G107-. Refer to → Heating, Ventilation and Air Conditioning; Rep. Gr.87; Additional Components for Control and Regulation; Sunlight Photo Sensor G107, Removing and Installing.
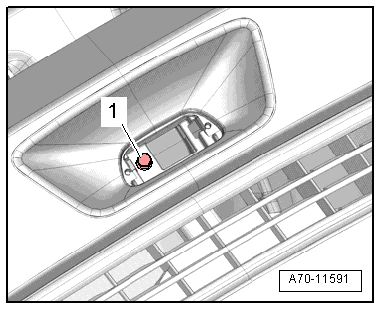
- Remove the screw -1- from the instrument panel cover.
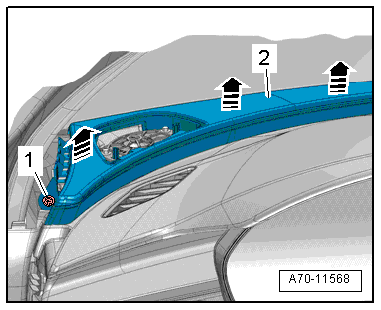
- Remove the left and right bolt near the A-pillar -1-.
- Remove the instrument panel cover -2- upward from the instrument panel using the Wedge Set - T10383- in direction of -arrows-.
- Remove the instrument panel cover from the instrument panel.
- Remove the instrument panel cover just far enough until it is possible to disconnect the connector from the treble speaker.
- Guide instrument panel cover on the front passenger side on the A-pillar and remove it.
Remove Trim Molding
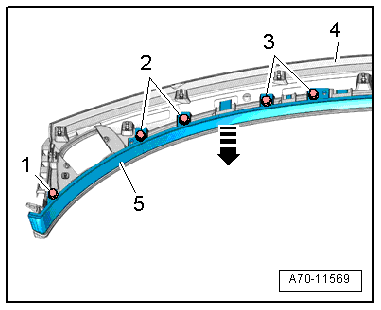
- Remove the bolts -1 to 3-.
- Unclip the trim strip -5- from the instrument panel cover -4- using the Trim Removal Wedge -3409- in direction of -arrow- and remove it.
Installing
Install in reverse order of removal. Note the following:
- Position the instrument panel cover and guide the connectors for the Sunlight Photo Sensor -G107- and speaker through the openings in the instrument panel cover.
- Press the instrument panel cover until it engages.
Installation notes, for example tightening specifications, replacing components. Refer to → Chapter "Overview - Instrument Panel".
Instrument Panel Decorative Trim, Removing and Installing
Instrument Panel Decorative Trim, Removing and Installing, Driver Side
Special tools and workshop equipment required
- Trim Removal Wedge -3409-
Removing
- Remove the instrument cluster gap cover. Refer to → Chapter "Instrument Cluster Gap Cover, Removing and Installing".
- Unclip the instrument panel trim -1- using the Trim Removal Wedge -3409--arrows- and remove it.
Installing
Install in reverse order of removal. Note the following:
Installation notes, for example tightening specifications, replacing components. Refer to → Chapter "Overview - Instrument Panel".
Instrument Panel Decorative Trim, Removing and Installing, Front Passenger Side
Special tools and workshop equipment required
- Trim Removal Wedge -3409-
- Wedge Set -T10383-
Removing
- Remove the glove compartment. Refer to → Chapter "Glove Compartment, Removing and Installing".
- Remove the instrument cluster gap cover. Refer to → Chapter "Instrument Cluster Gap Cover, Removing and Installing".
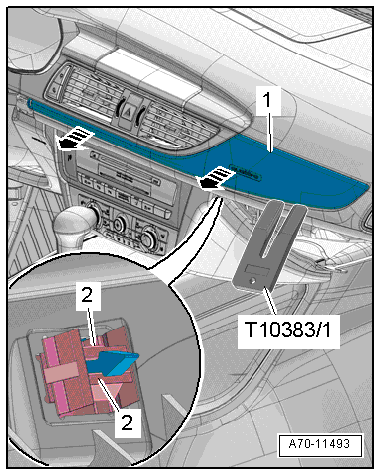
- Remove the trim panel -1- from the instrument panel using a Wedge Set -T10383/1--arrows-.
- Use the Trim Removal Wedge -3409- to release the catch on the clips -2-.
- Removing the trim for the instrument panel.
Installing
Install in reverse order of removal. Note the following:
Installation notes, for example tightening specifications, replacing components. Refer to → Chapter "Overview - Instrument Panel".