Audi A6 Typ 4G: Seat Heating Element, Removing and Installing
Seat Heating Element, Removing and Installing, Standard Seat/Sport Seat/Super Sport Seat
Removing
- Separate the seat cover and rear seat bench seat cushion. Refer to → Chapter "Cover and Cushion, Separating".
- Disconnect the wire -3- directly from the old heating element -2-.
 Note
Note
The old heating elements remain on the cushion and will be covered over by the new heating element.
Installing
- Align the new heating elements on the seat cushion.
- Remove protective films from the heating elements in succession, taking care not to damage the heating elements.
- Bond heating elements in the sequence -2-, -1- so that they align with the old heating elements and are wrinkle free.
- Route the connecting wires to the individual heating elements in the base of the gaps.
Install in reverse order of removal.
Installation notes, for example tightening specifications, replacing components. Refer to → Chapter "Overview - Seat Heating Element".
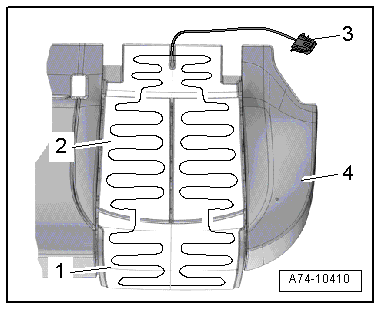
Seat Heating Element, Removing and Installing, Multi-contour Seat
Removing
- Separate the seat cover and rear seat bench seat cushion. Refer to → Chapter "Cover and Cushion, Separating".
- Disconnect the electric wire -3- directly from the old heating element.
Note
The old heating elements remain on the seat cushion -5- and will be covered over by the new heating element.
Installing
- Align the new heating elements on the seat cushion.
- Remove protective films from the heating elements in succession, taking care not to damage the heating elements.
- Bond heating elements in the sequence -1-, -2-, -4- so that they align with the old heating elements and are wrinkle free.
- Route the connecting wires to the individual heating elements in the base of the gaps.
Install in reverse order of removal.
Installation notes, for example tightening specifications, replacing components. Refer to → Chapter "Overview - Seat Heating Element".
Backrest Heating Element, Removing and Installing
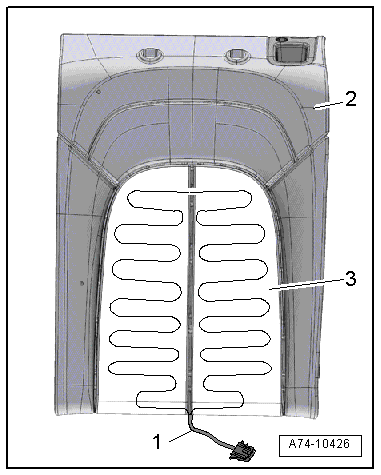
Backrest Heating Element, Removing and Installing, Standard Seat/Sport Seat/Super Sport Seat
Removing
- Separate the backrest cover and backrest cushion on the rear seat seatback. Refer to → Chapter "Cover and Cushion, Separating".
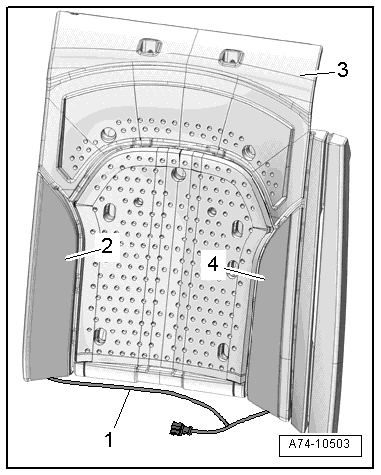
- Cut the wire -1- directly from the old heating element -3-.
Note
- The old heating element remains on the backrest cushion -2- and the new heating element is bonded over it.
- The illustration shows a vehicle with foldable rear seat back rests.
Installing
- Align the new heating element on the backrest cushion.
- Peel the protective film off the heating element. Be careful not to damage the heating element.
- Glue the heating element so that they align with the old heating element and free of wrinkles.
Install in reverse order of removal.
Installation notes, for example tightening specifications, replacing components. Refer to → Chapter "Overview - Seat Heating Element".
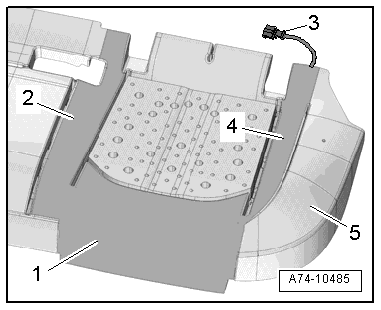
Backrest Heating Element, Removing and Installing, Multi-contour Seat
Removing
- Disconnect the backrest cover and the rear seat backrest cushion. Refer to → Chapter "Cover and Cushion, Separating".
- Disconnect the electric wire -1- directly from the old heating element -2 and 4-.
Note
The old heating elements remain on the seat cushion -3- and will be covered over by the new heating element.
Installing
- Align the new heating elements on the seat cushion.
- Remove protective films from the heating elements in succession, taking care not to damage the heating elements.
- Bond heating elements so that they align with the old heating elements and are free of wrinkles.
Install in reverse order of removal.
Installation notes, for example tightening specifications, replacing components. Refer to → Chapter "Overview - Seat Heating Element".
Special Tools
Special tools and workshop equipment required
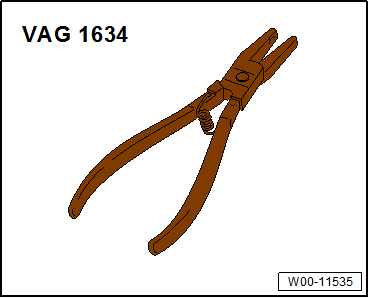
- Upholstery Clip Pliers -VAG1634-
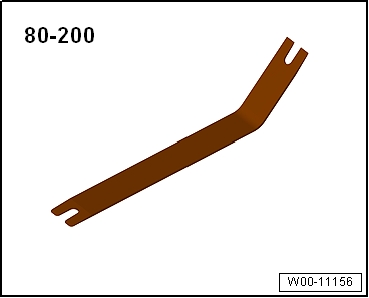
- Pry Lever -80-200-
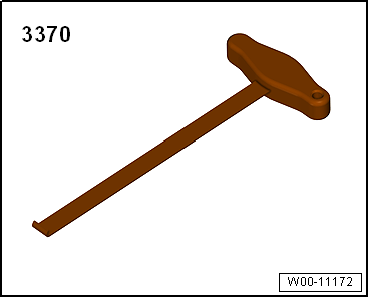
- Backrest Panel Tool -3370-
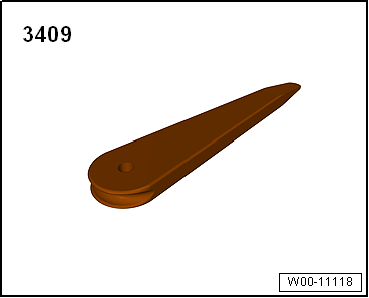
- Trim Removal Wedge -3409-