Audi A6 Typ 4G: LATCH Child Seat Anchors
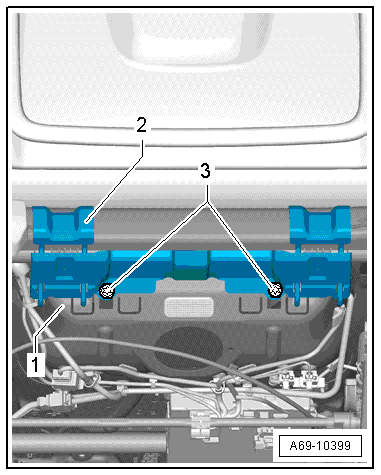
Overview - Front LATCH Child Seat Anchors
1 - Spring Nut
- Quantity: 2
- Inserted in the seat pan
- Replace any damaged or deformed threaded clips
2 - Seat Pan
3 - Seat Anchor
- Passenger seat only
- Bolted with the seat pan
- Check after an accident. Refer to → Chapter "LATCH Child Seat Anchors, Checking After a Collision".
- Replace damaged or deformed child seat anchor
- Removing and installing. Refer to → Chapter "Front LATCH Child Seat Anchor, Removing and Installing".
4 - Bolt
- 8 Nm
- Quantity: 2
- Replace
Overview - Rear LATCH Child Seat Anchors
Overview - Rear LATCH Child Seat Anchors
 Note
Note
The LATCH child seat anchor is welded to the floor panel.
1 - LATCH Child Seat Anchor
2 - LATCH Child Seat Anchor
3 - Guide
- For LATCH child seat anchor
- Quantity: 4
- Removing and installing. Refer to → Chapter "Rear LATCH Child Seat Anchor, Removing and Installing".
- Must be secure on the anchor
4 - Cover
- For child seat anchor
- Quantity: 4
- Removing and installing. Refer to → Chapter "Rear LATCH Child Seat Anchor, Removing and Installing".
- Must be secure on the anchor
Overview - Rear LATCH Child Seat Anchors, Avant
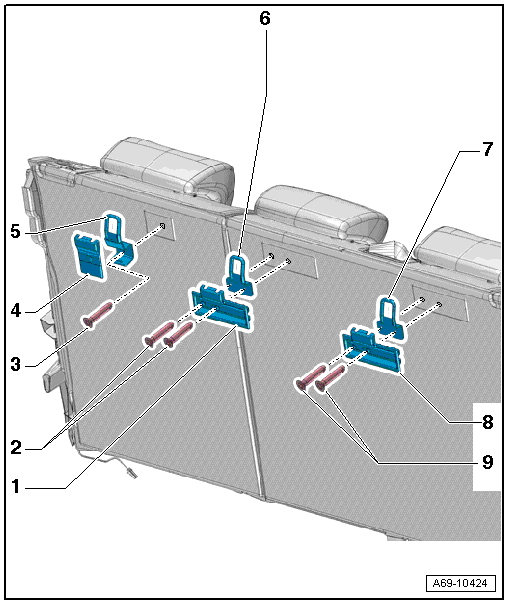
1 - Mount
- For the screen separator wall
- Equipment levels
2 - Bolts
- 9 Nm
3 - Bolt
- 9 Nm
4 - Cover
5 - LATCH Child Seat Anchor
- Removing and installing
6 - LATCH Child Seat Anchor
- Removing and installing
7 - LATCH Child Seat Anchor
- Removing and installing
8 - Mount
- For the screen separator wall
- Equipment levels
9 - Bolts
- 9 Nm
Front LATCH Child Seat Anchor, Removing and Installing
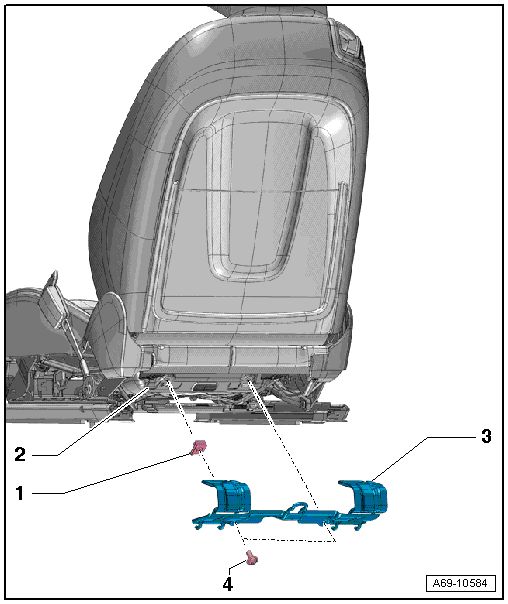
Removing
- Move the front passenger seat all the way forward and then raise it all the way up.
- Remove the bolts -3-.
- Remove the LATCH child seat anchor -2- toward the rear from the lower seat frame -1-.
Installing
Install in reverse order of removal. Note the following:
- Check the threaded clips -2- on the lower seat frame -1- for damage or deformation.
Installation notes, for example tightening specifications, replacing components. Refer to → Chapter "Overview - Front LATCH Child Seat Anchors".

Rear LATCH Child Seat Anchor, Removing and Installing
Note
The LATCH child seat anchor is welded to the vehicle rear end.
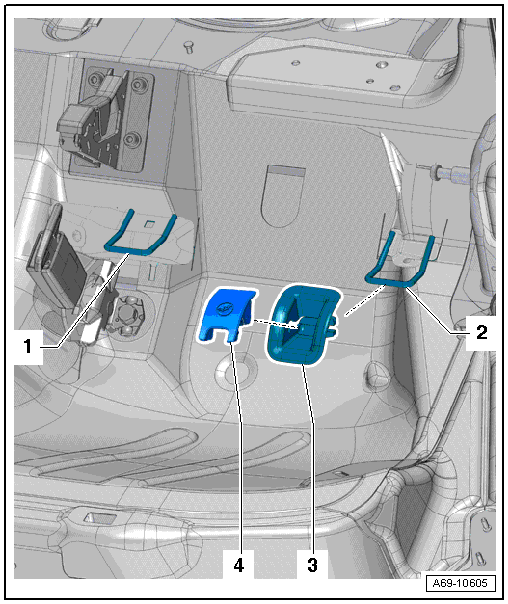
Removing the Lower Anchor, Bench Seat
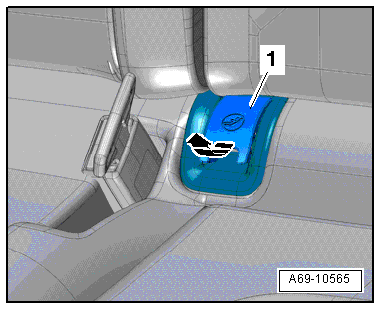
- Unclip the child seat anchor cover -1- from the anchor -arrow- and remove.
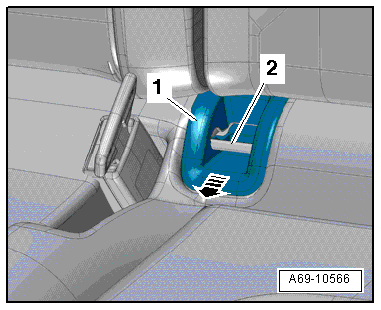
- Push the LATCH child seat anchor guide -1-, corresponding to cut-out, downward and disengage it from the anchor -2-.
- Remove the child seat anchor guide forward in direction of -arrow-.
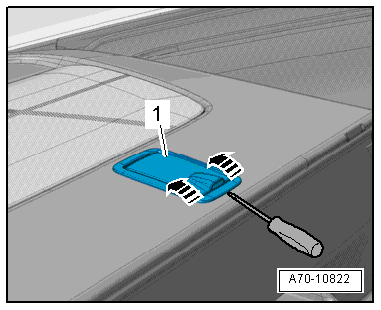
Removing the Upper Anchor from the Rear Shelf, Sedan
- Fold the rear seat backrest forward.
- Vehicles equipped with a fixed rear seat backrest: remove the headrest. Refer to → Chapter "Headrest, Removing and Installing".
- Unclip the cap -1- using a screwdriver -arrows- and remove it.
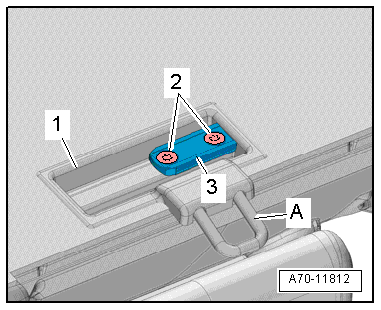
Removing the Upper Rear Seat Backrest Anchor, Avant
- Fold the rear seat backrest forward.
- Remove the bolts -2-.
- Remove the mount -3- and guide -1- for the screen separator.
- Remove the LATCH child seat anchor -A- from the rear seat backrest.
Installing
Install in reverse order of removal.
Installation notes, for example tightening specifications, replacing components. Refer to → Chapter "Overview - Rear LATCH Child Seat Anchors".