Audi A6 Typ 4G: Luggage Compartment Lamp -W3-, Removing and Installing
Luggage Compartment Lamp -W3-, Removing and Installing, Sedan
Removing
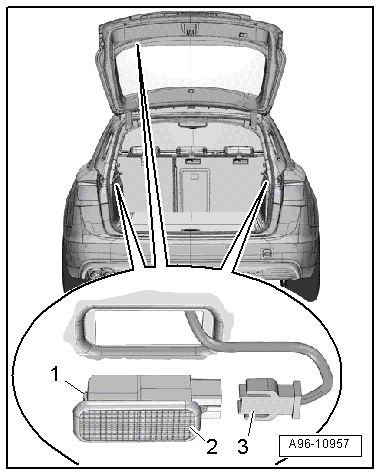
- Press in the tab -1- using a flat screwdriver and pry out the luggage compartment lamp -2-.
- Disconnect the connector -3-.

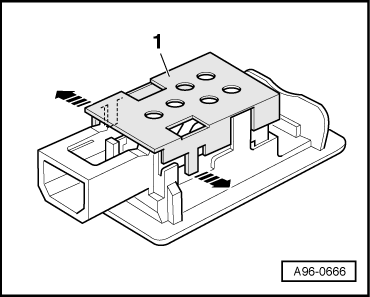
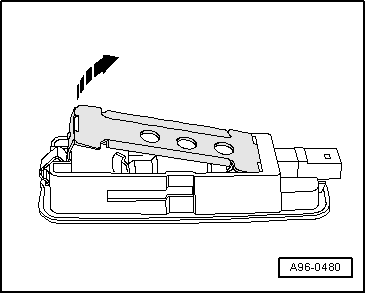
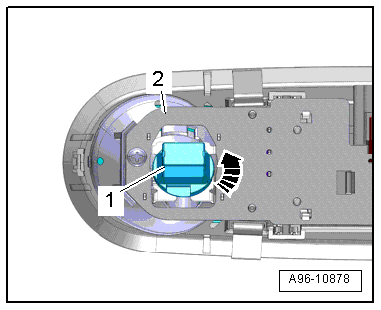
- Open the clips in direction of -arrows- and carefully remove the cover -1- over the bulb.
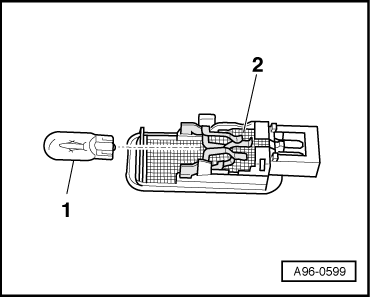
- Remove the bulb -1- from the bulb socket -2- on the back of the luggage compartment lamp.
Installing
Install in reverse order of removal. Note the following:
- Mount the cover on the luggage compartment lamp.
- Insert the luggage compartment lamp into the opening and engage on the opposite side.
Luggage Compartment Lamp -W3-, Removing and Installing, Avant
Removing
- Press in the tab -1- using a flat screwdriver and pry out the luggage compartment lamp -2-.
- Disconnect the connector -3-.
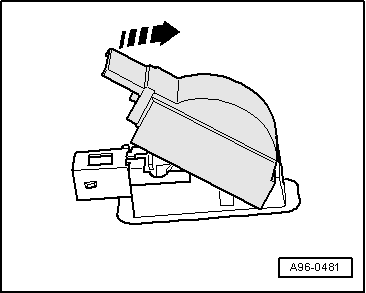
- Carefully lift the cover -1- over the bulb in direction of -arrow-.
- Remove the bulb -1- from the bulb socket -2- on the back of the luggage compartment lamp.
Installing
Install in reverse order of removal. Note the following:
- Mount the cover on the luggage compartment lamp.
- Insert the luggage compartment lamp into the opening and engage on the opposite side.
Driver/Front Passenger Vanity Mirror Lamp -W20-/-W14-, Removing and Installing
Removing
- Swivel the sun visor forward.
- Pry out the vanity mirror illumination -1- at the cut-out -arrow - using a flat-blade screwdriver.
- Disconnect the connector.

- Remove the cover in direction of -arrow- to change the bulb.
- Remove the bulb out of the clamp-type socket.
Installing
Install in reverse order of removal. Note the following:
 Note
Note
If one of the LEDs is faulty, then it is necessary to replace the entire vanity mirror illumination.
- Insert the vanity mirror illumination into the opening and lock on the opposite side.
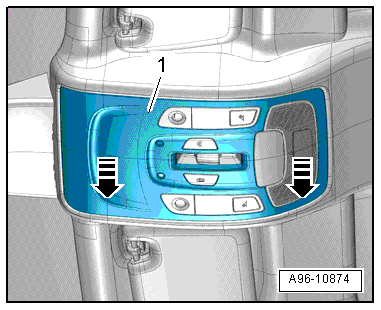
Front Interior Lamp -W1-/Front Passenger Reading Lamp -W13-/Driver Reading Lamp -W19-, Replacing
Front Interior Lamp -W1-, Replacing
Removing
- Remove the interior lamp cover -1- in direction of -arrows-.
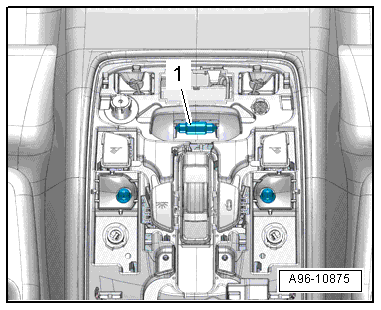
- Remove the bulb -1- from the clamp-type socket.
Installing
Install in reverse order of removal. Note the following:
- Press the interior lamp cover until it clicks into place.
Front Passenger/Driver Reading Lamp -W13-/-W19-, Replacing
Removing
- Remove the front interior/reading lamp. Refer to → Chapter "Front Interior Lamp/Reading Lamp, Removing and Installing".
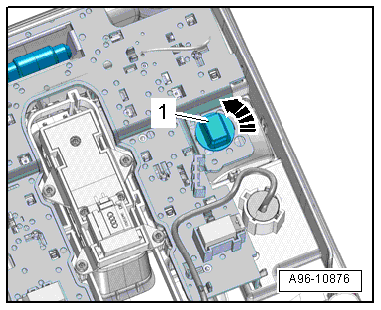
- Turn the bulb socket -1- counterclockwise in direction of -arrow- and remove it from the interior/reading lamp.
- Remove the bulb from the socket.
Installing
Install in reverse order of removal.
Left/Right Rear Interior Lamp -W47-/-W48-, Replacing
Removing
- Remove the rear interior/reading lamp. Refer to → Chapter "Rear Interior/Reading Lamp, Removing and Installing".
- Turn the bulb socket -1- counterclockwise in direction of -arrow- and remove it from the interior/reading lamp -2-.
- Remove the bulb from the socket.
Installing
Install in reverse order of removal. Note the following:
- Install the rear interior/reading lamp. Refer to → Chapter "Rear Interior/Reading Lamp, Removing and Installing".
Ambient Lighting LED, Removing and Installing
The ambient lighting LED is located in the front interior/reading lamp and cannot be replaced separately if faulty.
- Remove the front interior/reading lamp. Refer to → Chapter "Front Interior Lamp/Reading Lamp, Removing and Installing".
