Audi A6 Typ 4G: Overview - Interior Rearview Mirror
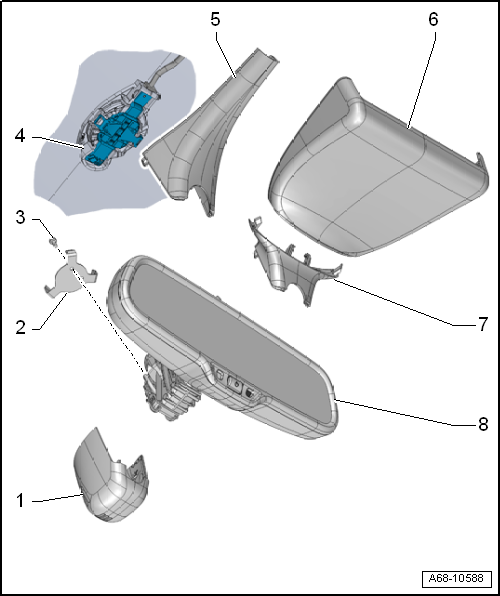
1 - Front Cover
- For the mirror base
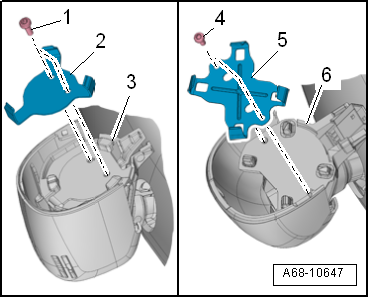
2 - Clamp
- For the interior rearview mirror
- There are different versions. For the correct allocation. Refer to the Parts Catalog.
- Replace after each time that the interior rearview mirror is removed
3 - Bolt
- 1.5 Nm
- Quantity: 2
4 - Retaining Plate
- For the interior rearview mirror
- Bonded to the windshield
5 - Rear Cover
- For the mirror base
- For interior rearview mirror without optional equipment
6 - Cover
- For interior rearview mirror with optional equipment
7 - Rear Cover
- For the mirror base
- For interior rearview mirror with optional equipment
8 - Interior Rearview Mirror
- Manual dimming rearview mirror or Automatic Dimming Interior Rearview Mirror -Y7-.
- There are different versions. For the correct allocation. Refer to the Parts Catalog.
- Removing and installing. Refer to → Chapter " Interior Rearview Mirror, Removing and Installing".
- Attach in the installed location while turned to 30º and turn it clockwise all the way
- Replace the retaining clips after every removal
Interior Rearview Mirror, Removing and Installing
Observe general notes when removing and installing. Refer to → Chapter "Automatic Dimming Interior Rearview Mirror Safety Precautions".
Removing
Interior Rearview Mirror with Optional Equipment
- Remove the lower cover -1- in direction of -arrows-.
- Using a screwdriver, unclip and remove the lower cover.
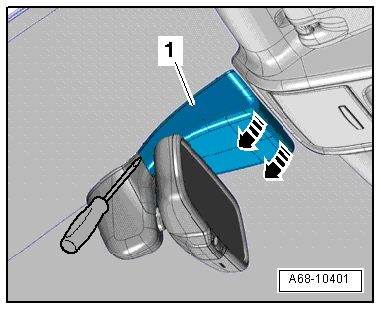
- Unclip cover -1- at the mirror base using a screwdriver and remove it.
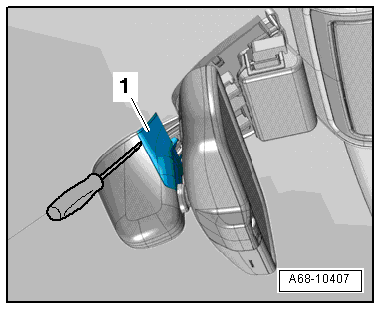
Interior Rearview Mirror without Optional Equipment
- Pry off cover -1- at the bottom of the mirror base -arrows-.
Continuation for All Mirror Versions
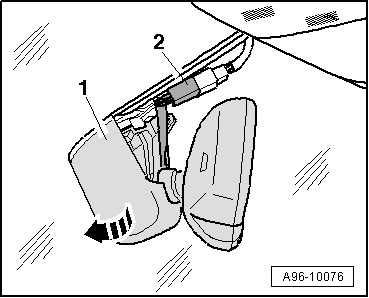
- Remove the connector -2- from the bracket and disconnect it.
- Turn interior rearview mirror at the mirror base -1- counterclockwise -arrow- as far as the stop and remove from the retaining plate.
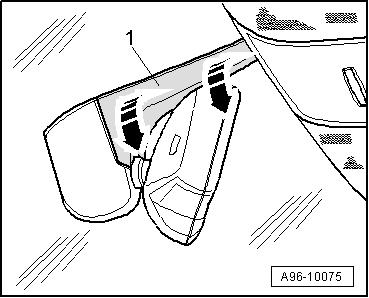
- Carefully disengage the tabs -arrows- and remove the front cover -1- downward out of the guide rods on the rearview mirror base -2-.

Installing
Install in reverse order of removal. Note the following:
- Always replace clips -2 and 5- for the interior rearview mirror if removed. For the correct allocation. Refer to the Parts Catalog.
- Position the interior rearview mirror turned 30º with respect to the installation position.
- Turn the interior rearview mirror counterclockwise as far as stop.
Installation notes, for example tightening specifications, replacing components. Refer to → Chapter" Overview - Interior Rearview Mirror".
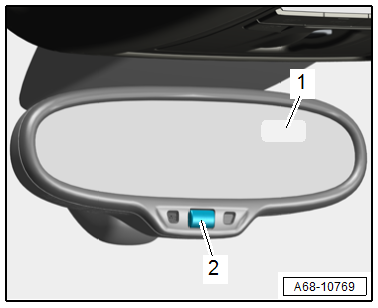
Automatic Dimming Function, Switching On and Off
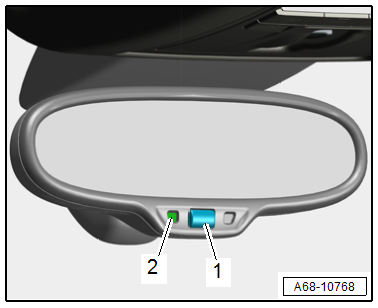
- By briefly pressing the button -1- (less than three seconds), the automatic dimming function is switched on or off automatically.
Automatic dimming "ON": the lamp in the display -2- comes on.
Automatic dimming "OFF": the lamp in the display -2- goes out.
- Automatic dimming function is activated each time "ignition is switched on".
- If the automatic dimming function is deactivated, the function is also deactivated on the exterior rearview mirror.
- In dimming mode, mirror surface lights up when interior lights are switched on or reverse gear is engaged.
- The interior rearview mirror automatic dimming function can only work properly if the sun shade is raised.
Compass Display, Switching On and Off
- Press and hold the button -2- three to six seconds. The compass display -1- changes from "ON" to "OFF" and vice versa.
Compass display "ON" - the direction is displayed.
Compass display "OFF" - the direction is not displayed.