Audi A6 Typ 4G: Start/Stop System
Overview - Start/Stop System
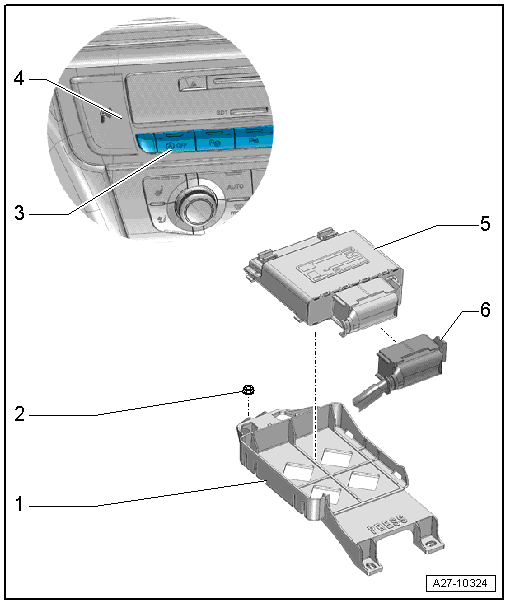
1 - Bracket
- For the Voltage Stabilizer -J532-
2 - Nut
- 3 Nm
3 - Start/Stop Mode Button -E693-
- Removing and installing. Refer to → Chapter "Instrument Panel Button, Removing and Installing".
4 - Trim
- For Information Electronics Control Module 1 -J794-
5 - Voltage Stabilizer -J532-
- Removing and installing. Refer to → Chapter "Voltage Stabilizer, Removing and Installing".
6 - Connector
Voltage Stabilizer, Removing and Installing
Removing
- Turn off the ignition.
- Lift the luggage compartment floor covering by the handle and fold it forward.
- If equipped, remove the spare tire well trim. Refer to → Body Interior; Rep. Gr.70; Luggage Compartment Trim Panels; Spare Wheel Well Trim, Removing and Installing.
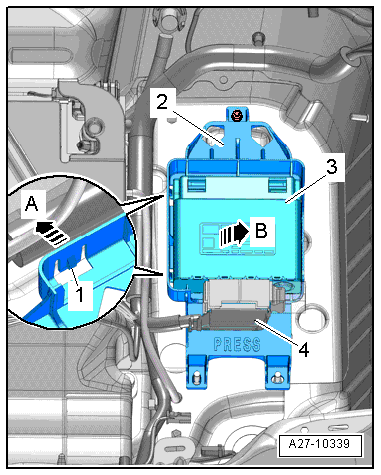
- Release the tabs -1- in direction of -arrow A- and remove the Voltage Stabilizer -J532--item 3- from the bracket -2- in direction of -B arrow-.
- Disconnect the connector -4-.
Installing
Install in reverse order of removal.