Audi A6 Typ 4G: Subframe Crossbrace, Removing and Installing
Special tools and workshop equipment required
- Torque Wrench 1332 40-200Nm -VAG1332-
Removing
- Place the vehicle on a hoist. Refer to → Chapter "Raising and Lowering with Open and Closed Air Suspension System".
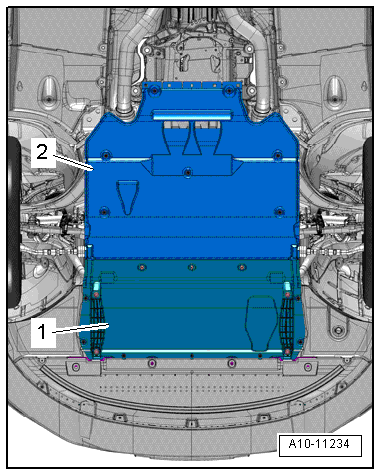
- Remove the noise insulations -1 and 2-. Refer to → Body Exterior; Rep. Gr.66; Noise Insulation; Noise Insulation, Removing and Installing.
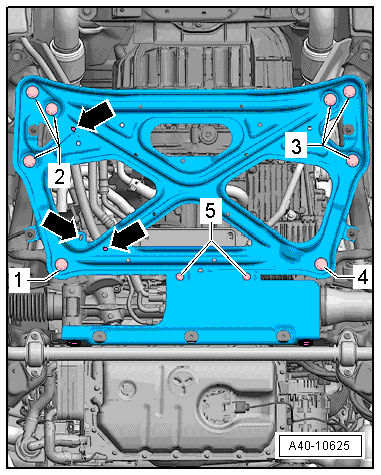
- Remove the clips from the wiring harness -arrows-.
- Remove the bolts -1 through 5- and the crossbrace.
 Caution
The suspension components could be damaged.
If the subframe, the steering gear or the subframe crossbrace are not installed correctly, do not rest the vehicle on its wheels.
The vehicle must not be supported on the subframe or the subframe crossbrace (for example using a floor jack).
If the vehicle must be moved, the crossbrace must be installed with the old bolts and tightened to the specification without any additional turning.
Installing
Install in reverse order of removal.
Subframe Heatshield, Removing and Installing
Special tools and workshop equipment required
- Torque Wrench 1410 -VAG1410-
- Torque Wrench 1410 Insert - Ratchet -VAG1410/3-
Removing
- Place the vehicle on a hoist. Refer to → Chapter "Raising and Lowering with Open and Closed Air Suspension System".
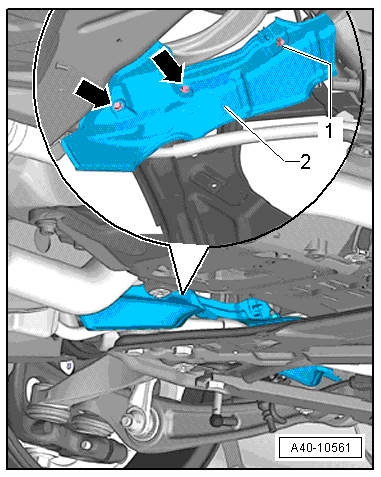
- Remove the noise insulation. Refer to → Body Exterior; Rep. Gr.66; Noise Insulation; Noise Insulation, Removing and Installing.
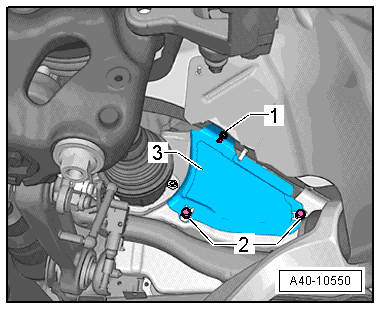
- Remove the nuts -1- and bolts -2- and remove the heat shield upper section -3-.
- If equipped remove the Transmission Fluid Cooling Valve -N509-. Refer to → Rep. Gr.19; Coolant Pump/Thermostat; Coolant Valve, Removing and Installing.
- Remove the bolts -arrows- and nut -1-.
- Remove the heat shield lower section -2- to the rear between the body and the subframe.
If the vehicle has a 6-cylinder TDI engine, then remove the crossbrace first and then remove the right heat shield lower section. Refer to → Chapter "Subframe Crossbrace, Removing and Installing".
Installing
Install in reverse order of removal. Note the following: