Audi A6 Typ 4G: Sun Visor, Removing and Installing
Removing
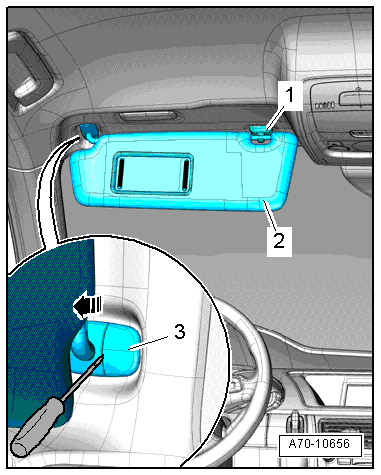
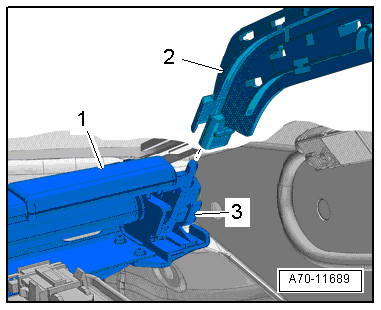
- Disengage the sun visor -2- at the center support -1-.
- Unclip the expanding cap -3- using a screwdriver.
- Remove the sun visor mount downward -arrow- out of the opening in the body.
- Disconnect the electrical connector and remove the sun visor.
Installing
Install in reverse order of removal. Note the following:
Installation notes, for example tightening specifications, replacing components. Refer to → Chapter "Overview - Sun Visors".
Sun Visor Center Support, Removing and Installing
Special tools and workshop equipment required
- Angled Screwdriver -VAS6543-
Removing
- Detach the sun visor at the sun visor center mount and flip to the side.
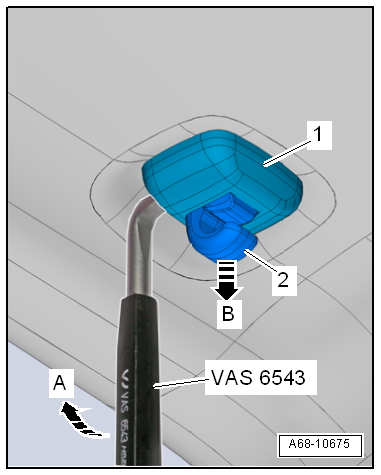
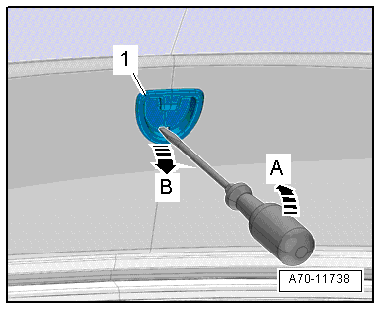
- Unclip the sun visor center bracket cover -1- by sliding the Angled Screwdriver -VAS6543- only about 1 mm under the cap -arrow A-.
 Note
Note
If the Angled Screwdriver -VAS6543- is inserted further, it will be located under the sun visor center mount. It is not possible then to pry out the cover.
- Remove sun visor center mount -2--arrow B-.
Installing
Install in reverse order of removal.
Installation notes, for example tightening specifications, replacing components. Refer to → Chapter "Overview - Sun Visors".
Sun Shade, Removing and Installing
Sun Shade, Removing and Installing, Sedan
Special tools and workshop equipment required
- Pry Lever -80-200-
- Omega Clip Tool -T40280-
Removing
- Remove the rear shelf front section. Refer to → Chapter "Rear Shelf, Removing and Installing".
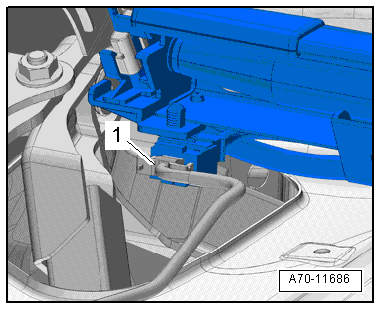
- Disconnect the electrical connector -1- from the sun shade.
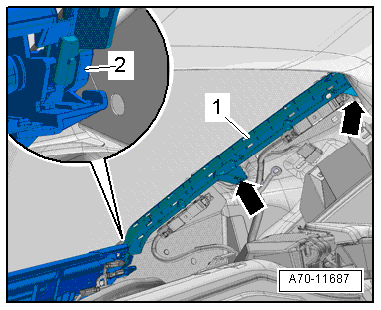
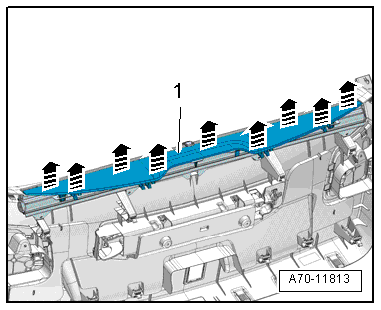
- Unclip the sun shade guide strip -1- using the Pry Lever -80-200--arrows-.
- Pivot the top part of the guide strip toward the inside just a little bit and use a screwdriver to release the hooks -2-.
- Remove guide strip pulling it upward from the connecting piece on the sun shade.
- Repeat procedure on opposite side of vehicle.
- Loosen the bolts -1- for the sun shade from the luggage compartment by turning them a couple of times.
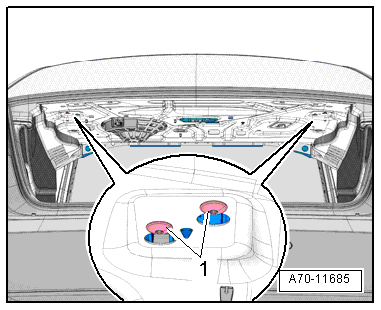
- Raise the sun shade and rear shelf -1- a little bit and carefully lift them out of their mounts -arrow- on the rear window frame.
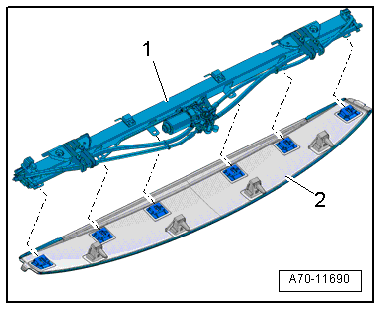
- Detach the sun shade -1- from the back part of the rear shelf -2- by using a screwdriver to first release the catch mechanisms and then remove the rear shelf.
Installing
Install in reverse order of removal. Note the following:
- If it has already been removed, install the sun shade -1- onto the back part of the rear shelf -2- and keep pressing down on it until it audibly clicks into place.
- Install the sun shade and the back part of the rear shelf -1- in the rear window frame and tighten the bolts.
- The pins on the rear shelf must catch on the holding mounts and remain in place -arrow- on the rear window frame.
- Carefully insert the guide strip -2- in the connecting piece for the sun shade -1-.
- The sun shade guide channel must run into the guide strip without the connecting piece being offset.
- Press the guide strip into place until you hear the hooks clip into place -3- on the connector piece.
Installation notes, for example tightening specifications, replacing components. Refer to → Chapter "Overview - Sun Shade, Sedan".
Sun Shade, Removing and Installing, Avant
Special tools and workshop equipment required
- Trim Removal Wedge -3409-
- Omega Clip Tool -T40280-
Removing
- Remove the lower rear lid trim panel. Refer to → Chapter "Lower Rear Lid Trim Panel, Removing and Installing, Avant".
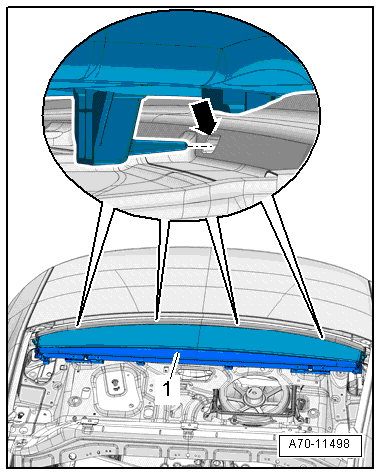
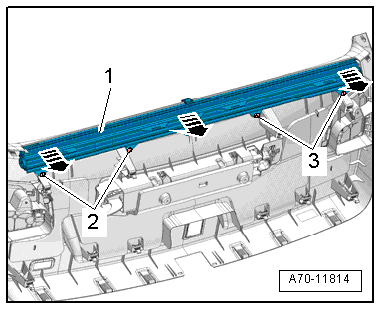
- Unclip the cover -1- with the Trim Removal Wedge -3409- from the sun shade -arrows- and remove.
- Remove the bolts -2 and 3-.
- Remove the sun shade -1- from the rear lid lower trim panel -arrows-.
Installing
Install in reverse order of removal. Note the following:
Installation notes, for example tightening specifications, replacing components. Refer to → Chapter "Overview - Sun Shade, Avant".
Sun Shade Mount, Removing and Installing
Removing
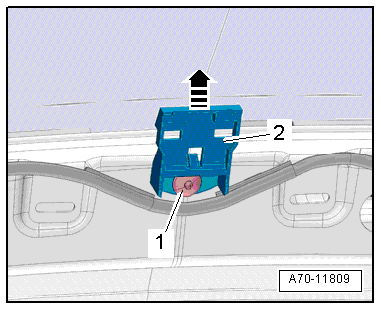
- Release the hooks with a screwdriver in direction of -arrow A-.
- Unhook and remove the rear window shade mount -1- from the bracket in direction of -arrow B-.
- Remove the upper rear lid trim panel. Refer to → Chapter "Upper Rear Lid Trim Panel, Removing and Installing".
- Remove the bolt -1-.
- Unhook and remove the rear window shade mount bracket -2- from the rear window frame -arrow-.
Installing
Install in reverse order of removal. Note the following:
Installation notes, for example tightening specifications, replacing components. Refer to → Chapter "Overview - Sun Shade, Avant".