Audi A6 Typ 4G: Window Regulator Motor, Removing and Installing
Removing
 Note
Note
The window regulator motor can be removed or installed with the motor or door window in any position.
- Remove the door trim panel. Refer to → Body Interior; Rep. Gr.70; Front Door Trim Panels; Front Door Trim Panel, Removing and Installing.
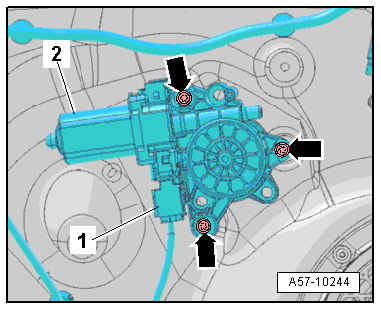
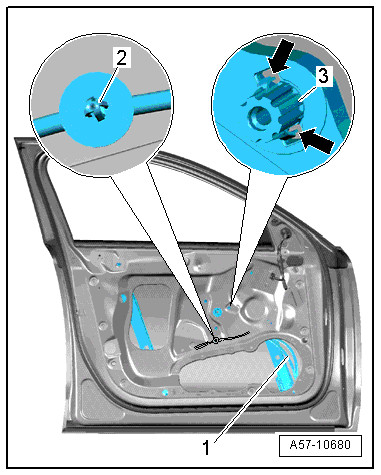
- Disconnect the connector -1- on the door control module.
- Remove the bolts -arrows- and remove the window regulator motor -2- from the window regulator.
Installing
Install in reverse order of removal. Note the following:
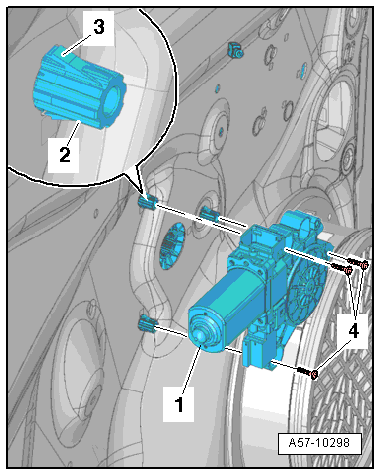
- The clips -3- for the window regulator motor threaded pins -2- must be engaged in the inner door panel.
- Slide the window regulator motor -1- onto the threaded pins and tighten the bolts -4-.
Window Regulator, Removing and Installing
Removing
- Remove the window regulator motor. Refer to → Chapter "Window Regulator Motor, Removing and Installing".
- Remove the bass speaker. Refer to → Communication; Rep. Gr.91; Sound System; Front Bass and Bass/Midrange Speakers, Removing and Installing.
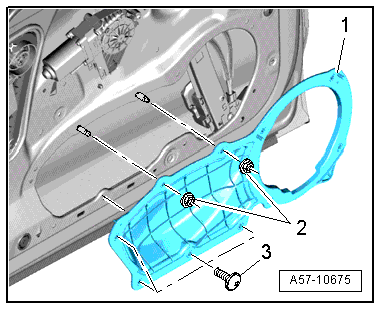
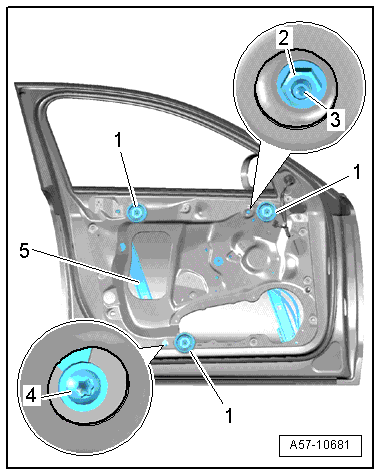
- Remove the nuts -2- and screws -3- from the trim -1-.
- Remove the door window. Refer to → Chapter "Front Door Window, Removing and Installing".
- Open the clips -arrows- on the threaded pin -3- for the window regulator using an 11 mm socket. To do this, place the socket on the threaded pins.
- Unclip the cable -2- from the cable guide -1- on the inside of the door.
- Remove the upper and lower plugs -1-.
- Remove the nuts -2- at the top and loosen the bolts -4- at the bottom.
- Remove the window regulator toward the rear through the opening in the inner door panel.
Installing
- Install in reverse order of removal. Note the following:
Install the cables into the inner door panel. Make sure they are routed correctly.
Tightening Specifications
- Door trim 3 Nm
Closing Assist Motor, Removing and Installing
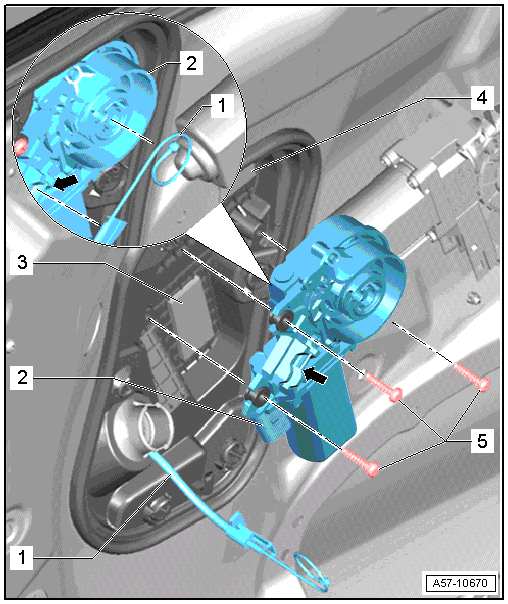
1 - Release Cable
2 - Driver Door Closing Assist Motor -V302-
- Removing
- Remove the door trim panel. Refer to → Body Interior; Rep. Gr.70; Front Door Trim Panels; Front Door Trim Panel, Removing and Installing.
- Disconnect the connector from the motor.
- Remove the bolts from the motor.
- Guide the release cable out of the cable winder.
- Installing
- When installing, first insert the cable end into the cable winder.
- Place the cable 360º inside the groove in the cable winder.
- Install the cable -arrows- into the motor.
- Tighten the motor.
3 - Insulation
4 - Inner Door Panel Cover
5 - Bolt
- 3.5 Nm
Door Inner Cover, Removing and Installing
Note
The illustration shows the cover for a vehicle with close assist and locks that have to be released before removing.
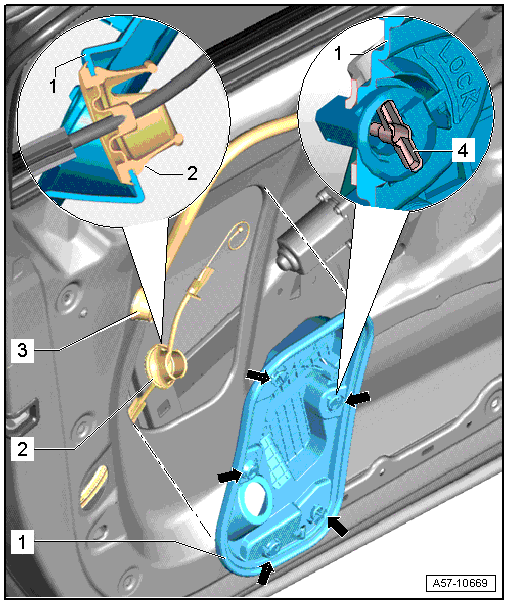
1 - Cover
- Remove the door trim panel. Refer to → Body Interior; Rep. Gr.70; Front Door Trim Panels; Front Door Trim Panel, Removing and Installing.
Vehicle without close assist
- Remove the electric wires from the clamps -5-.
- When removing the cover, always start at the top.
Vehicle with closing aid
- Disconnect the voltage supply to the closing assist motor
- Open the releases (quantity: 5) -arrows- turning them to the left and remove the cover from the inner door panel.
2 - Grommet with Cable
 Caution
Do not bend the cables when installing them.
- Always make sure it fits correctly.
3 - Inside Door Release Mechanism Release
4 - Release (Quantity: 5)
- Turn the cover to the left to unlock it.
- Must click into the place when being installed.
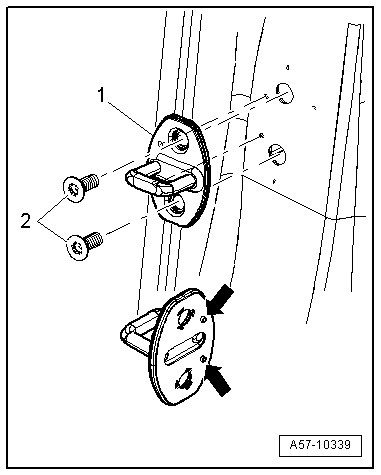
Catch, Removing and Installing
Removing
- Remove the bolts -2- and the catch -1-.
Installing
Install in reverse order of removal. Note the following:
- Adjust the catch. Refer to → Chapter "Door, Adjusting".