Audi A6 Typ 4G: Hinges, Removing and Installing
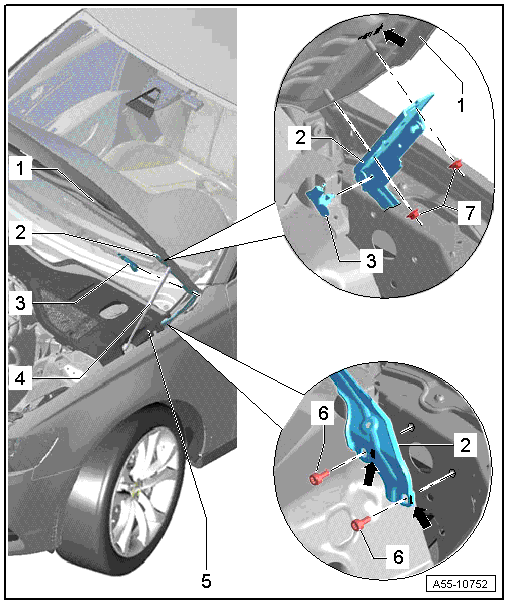
1 - Hood
2 - Hood Hinge
- Removing
- Before removing a hood hinge, support the hood or secure it against falling.
- Remove the gas-filled strut. Refer to → Chapter "Gas-Filled Strut, Removing and Installing"
- Remove the bolts -4- and nuts -5-.
- Installing
- Align with the markings -arrows- in reverse order.
3 - Gas-Filled Strut
- Attach the gas-filled strut tube on the lid side
- Removing. Refer to → Chapter "Gas-Filled Strut, Removing and Installing".
4 - Cover
- Clipped into the hinge on the side
5 - Fender Flange
6 - Bolt
- 21 Nm
7 - Nut
- 21 Nm
Insulation, Removing and Installing
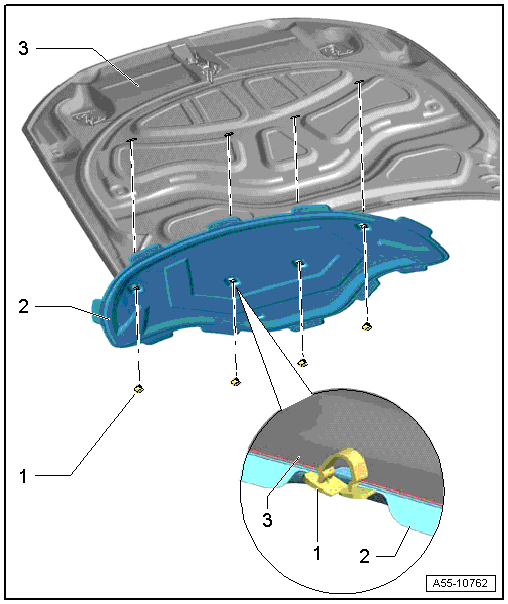
1 - Clamp
2 - Hold Panel
- Installation:
- Slide the lining over the tabs on the rear edge into the holes provided on the inner panel.
- Slide the tabs on the front edge and the sides into place.
- The clips must engage audibly when pressing in.
- Press the clip in.
3 - Door
4 - Clip
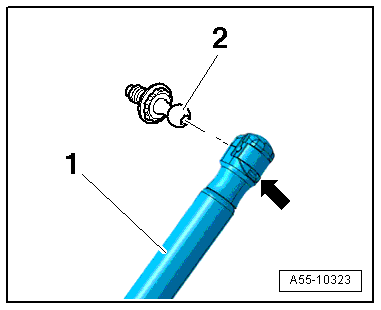
Gas-Filled Strut, Removing and Installing
Removing
- Support the lid or secure it against falling.
- Using a small screwdriver, lift the securing spring -arrow- slightly and remove the gas-filled strut -1- from the upper ball stud -2-.
- Repeat procedure on lower ball stud.
Installing
 Note
Note
After complete removal of the gas-filled strut ensure correct positioning during installation: the gas-filled strut tube must be attached on the lid side.
- Press gas-filled strut onto ball stud and engage.
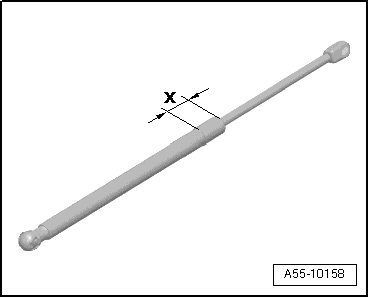
Gas-Filled Strut, Releasing Gas
Procedure
- Clamp gas-filled strut in a vise in area -x- = 50 mm.
 WARNING
- Clamp only within this area, otherwise accident could occur!
- Wear protective eyewear when sawing.
Note
Cover area of sawn portion with a rag to absorb oil spraying out.
- Cut through the gas-filled strut cylinder within the first third of the overall cylinder length using the piston rod end of the cylinder as a reference point.
Release Cable, Removing and Installing
Release Cable Coupling

- Remove clips -1- and lift the release cables -8- and -9- on both sides toward the hood latches.
- To remove the coupling -2-, release the retainers -arrows- on the front of the lock carrier -3- and push them to the rear out of the bracket.
- Engage the release cable to the vehicle interior -4- into the coupling roller -5- as illustrated.
- Press the release cable into the mount on the housing.
- Install the housing cover -7- so that the arrow points toward the release cable inside the passenger compartment.
- Adjust the release cable -8- using the knurl -6- so that the hood catches unlock evenly.
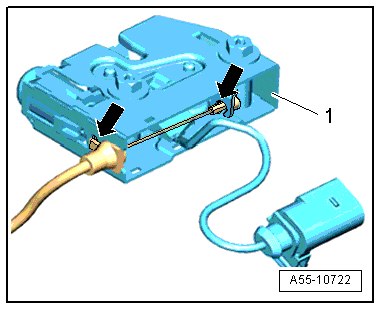
Release Cable, Engaging in Lid Latch
- Insert the release cable -2- into the operating lever -right arrow- inside the hood lock -1-.
- Install the release cable and the guide into the hood latch from underneath. Make sure the hooks -left arrow- latch into place.
Engaging the Release Cable in Release Lever
- Install the release cable -2- into the hood release lever -1- in the direction of the -arrow-.
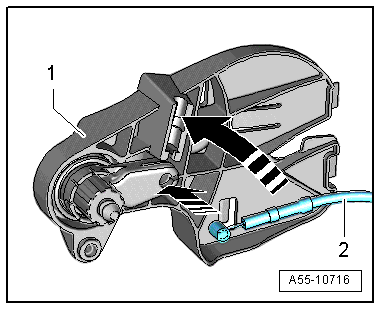
- Move the release cable -2- upward as illustrated and clip it into the bracket -1-.
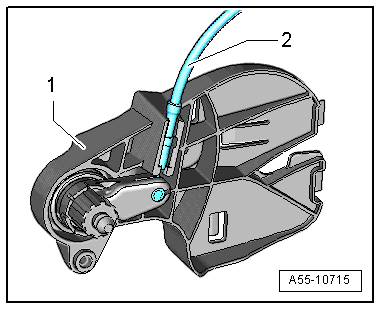
Routing the Release Cable Inside the Passenger Compartment
- Route the release cable -2- along the "A-pillar" as illustrated.
- Press the grommet -1- onto the "A-pillar" from the interior.

Routing the Release Cable Inside the Engine Compartment
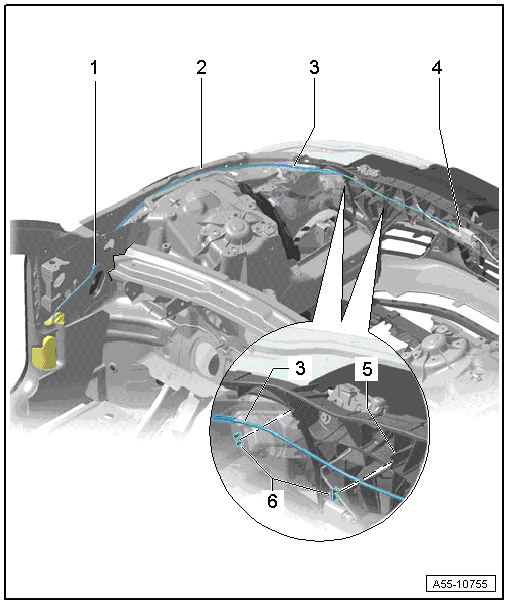
- Route the release cable -3-, starting from the passenger compartment, inside the engine compartment and along the fender flange -2- as illustrated.
- Make sure that the grommet -1- is properly pressed sideways into the A-pillar.
- Slide the coupling -4- onto the lock carrier.
- Push the release cable and clips -6- onto the tabs -5-.
