Audi A6 Typ 4G: Rear Lid, Removing and Installing
Rear Lid, Removing and Installing, Sedan
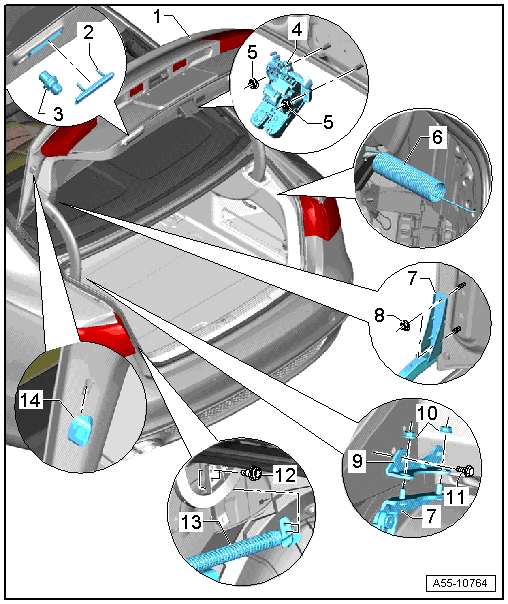
1 - Rear Lid
- A second technician will be needed during removal and installation to support and to hold the rear lid.
- Removing:
 Note
Note
Mark the position of the rear lid on the rear lid hinge with a felt-tip pen before removing.
- Remove the rear lid trim panel. Refer to → Body Interior; Rep. Gr.70; Luggage Compartment Trim Panels; Lower Rear Lid Trim Panel, Removing and Installing
- Disconnect the electric wires on the connectors and pull them out of the rear lid.
- Remove the nuts on the rear lid side and then remove the rear lid.
- Install in reverse order of removal.
- The springs -6- must be engaged before installing the rear lid.
- Adjusting:
- Adjust the front height and the position of the hood lengthwise using the hood hinge.
- Adjust the height of the back of the rear lid by adjusting the rear lid latch.
- Align the hood so it is centered according to the gap dimensions. Refer to → Chapter "Rear Lid, Adjusting".
- Adjusting buffer stops
- Rear Lid Seal, Removing and installing. Refer to → Chapter "Rear Lid Seal, Replacing Sedan".
2 - Stop Strip
3 - Adjusting Buffer
4 - Rear Lid Latch
5 - Nut
6 - Spring
7 - Lid Hinge
8 - Nut
- 21 Nm
9 - Bracket
10 - Nut
- 21 Nm
11 - Bolt
- 21 Nm
12 - Bolt
- 21 Nm
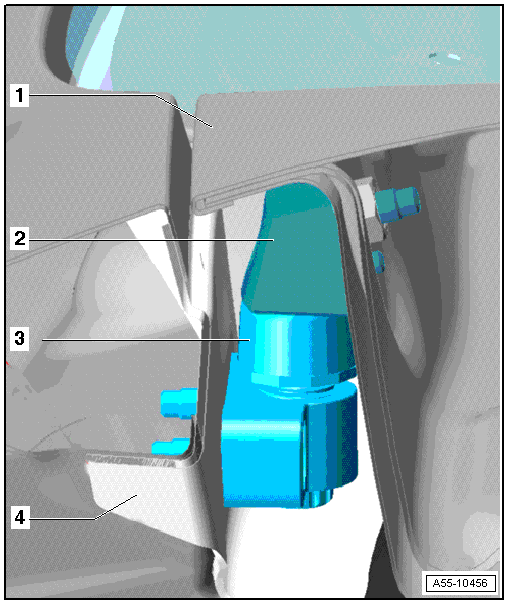
13 - Rear Lid Motor 1 -V444-
14 - Side Stop
Rear Lid, Removing and Installing, Avant
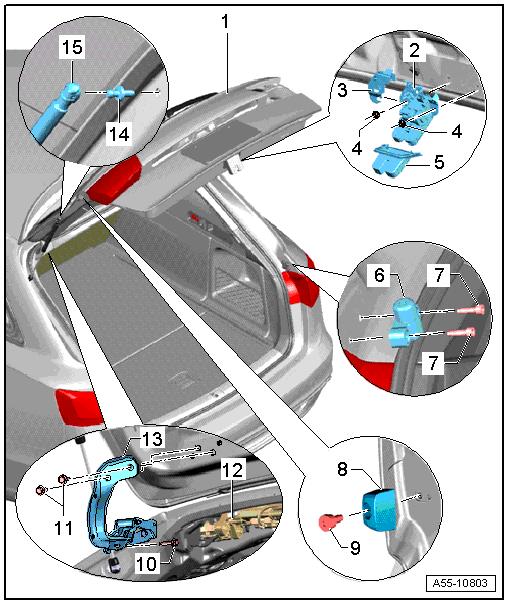
1 - Rear Lid
- Removing:
- Remove the rear lid trim panel. Refer to → Body Interior; Rep. Gr.70; Luggage Compartment Trim Panels; Upper Rear Lid Trim Panel, Removing and Installing
- Disconnect the connectors and remove the hose for the rear window washer system.
- A second technician will be needed to hold and to lift the rear lid.
- Pull the gas-filled struts off the rear lid.
- Remove the bolts from the left and right hinges on the rear lid.
- Remove the rear lid.
2 - Lid Latch
3 - Cover
4 - Nuts
5 - Cover
6 - Adjusting Buffer
7 - Screws
8 - Stop
9 - Bolt
10 - Bolt
- 21 Nm
11 - Bolt
- 30 Nm
12 - Rear Lid Motor 2 -V445-
13 - Lid Hinge
14 - Ball Stud
15 - Gas-Filled Strut
- Noise insulation element must be engaged in rear lid side.
- Push the insulation onto the ball stud while turning it gently.
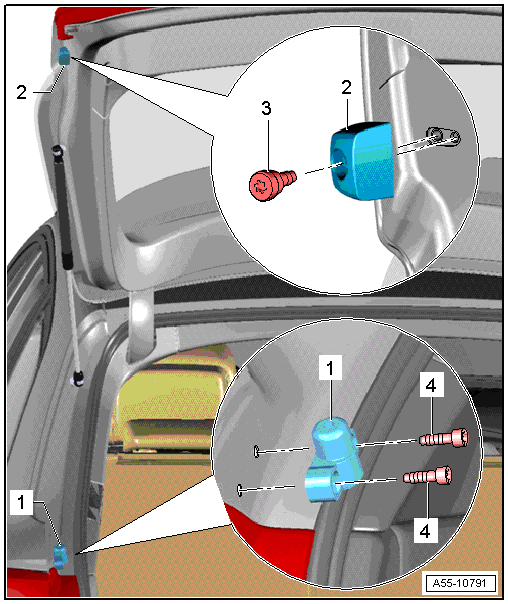
Side Stop Buffer, Removing and Installing, Sedan through Model Year 2014
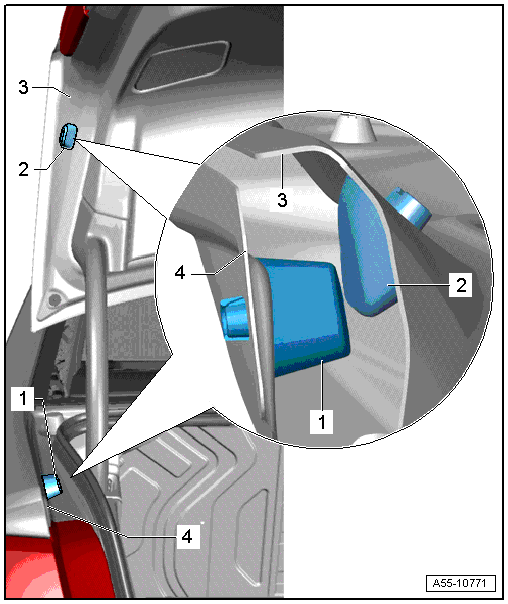
1 - Stop, Body Side
- Removing.
- Install the stop buffer into the hole and push the slider all the way in.
2 - Stop, Rear Lid Side
- Removing.
- Install the stop buffer into the hole and push the slider all the way in.
3 - Rear Lid
4 - Side Panel
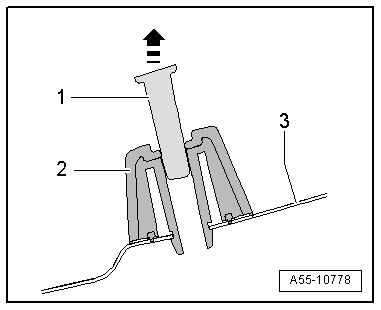
Removing the Side Stop Buffer
- Pull the slider -1- in direction of the -arrow- out of the stop.
- Remove the stop from the side panel or rear lid.
Stop and Adjusting buffer, Removing And Installing, Avant
1 - Adjusting Buffer
- Adjusting
2 - Stop
3 - Bolt
- 8 Nm
4 - Bolt
- 8 Nm
Adjusting buffer Installed Position
1 - Rear Lid
- When adjusted correctly, adjusting buffer -3- must contact stop buffer -2- with light pretension when rear lid is closed.
2 - Stop
3 - Adjusting Buffer
- There is an adjusting screw for adjusting the height.
- When rear lid is adjusted correctly, adjusting buffer must make contact with light pre-tension with stop on rear lid side.
4 - Side Panel
