Audi A6 Typ 4G: Left Seal, Replacing
Left Seal, Replacing, 0BC
- In this chapter "right seal, replacing" is also described.
- The shaft seal can be only be replaced with the final drive removed.
Special tools and workshop equipment required
- Puller - Flanged Shaft -T10037-
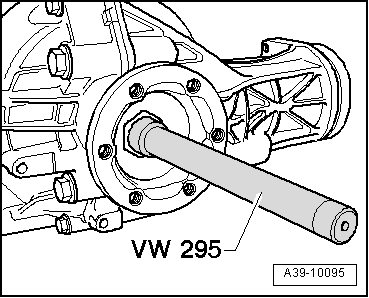
- Bearing/Bushing Installer - Multiple Use -VW295-
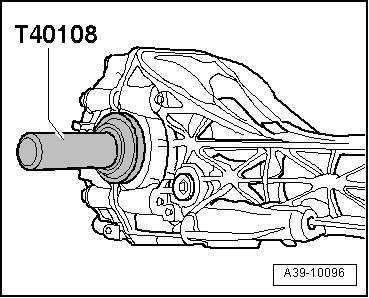
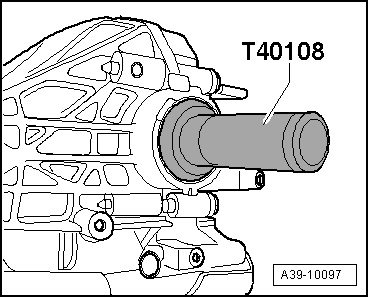
- Seal Installer - Flange Shaft -T40108-
- Sealing Grease -G 052 128 A1-
Removing
- Follow all general repair information. Refer to → Chapter "Repair Information".
- Remove the rear final drive. Refer to → Chapter "Final Drive, Removing and Installing".
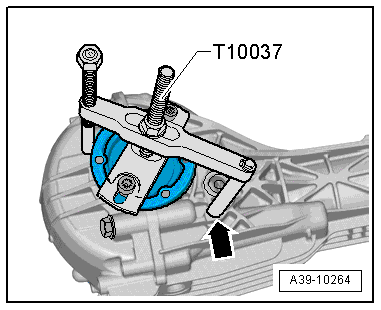
Remove the Right Flange Shaft.
- Attach the Puller - Flanged Shaft -T10037- to the housing -arrow- and remove the flange shaft.
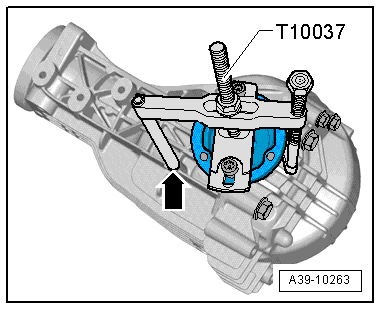
Left Flange Shaft, Removing
- Attach the Puller - Flanged Shaft -T10037- to the housing -arrow- and remove the flange shaft.
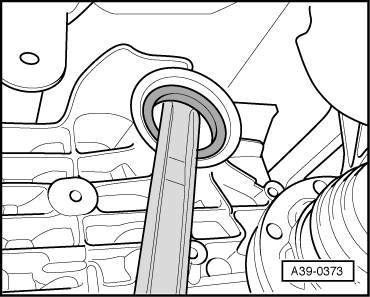
- Use a suitable tool to pry out the seal.
Installing
Install in reverse order of removal. Note the following:
Right Shaft Seal, Installing
- Coat outer edge of the seal with gear oil.
- Fill the space between the sealing/dust lip halfway with Sealing Grease -G 052 128 A1-.
- Drive in new shaft seal as far as stop without tilting it.
Left Shaft Seal, Installing
- Coat outer edge of the seal with gear oil.
- Fill the space between the sealing/dust lip halfway with Sealing Grease -G 052 128 A1-.
- Drive in new shaft seal as far as stop without tilting it.
Right and Left Flange Shafts, Installing
- Drive the flange shaft in using a Bearing/Bushing Installer - Multiple Use -VW295-.
- Install the rear final drive. Refer to → Chapter "Final Drive, Removing and Installing".
- Check the gear oil in rear final drive. Refer to → Chapter "Gear Oil, Checking Level, 0BC".
Left Seal, Replacing, 0BE, 0BF
- In this chapter "right seal, replacing" is also described.
- The shaft seal can be only be replaced with the final drive removed.
Special tools and workshop equipment required
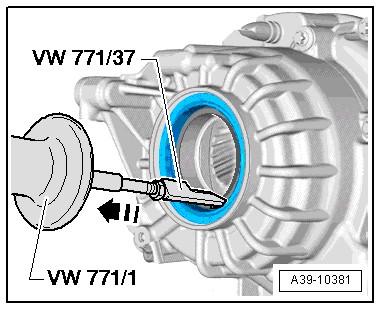
- Slide Hammer Set -VW771-
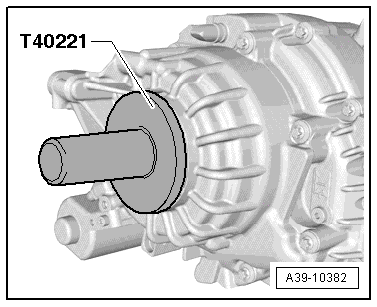
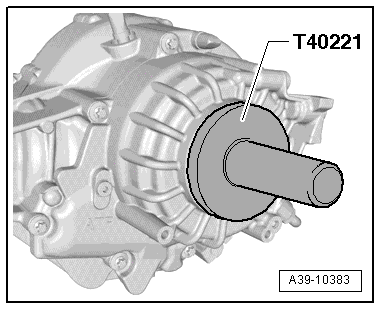
- Seal Installer - Drift Shaft -T40221-
- ATF
Removing
- Follow all general repair information. Refer to → Chapter "Repair Information".
- Remove the rear final drive. Refer to → Chapter "Final Drive, Removing and Installing".
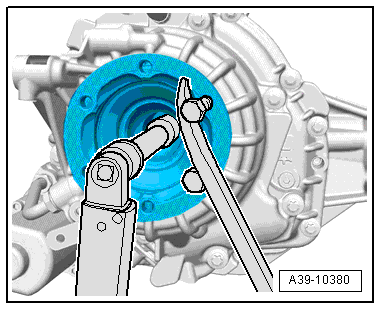
- Remove the flange shaft bolt. To do this, install two bolts into the flange and counterhold the flange shaft using an assembly lever.
- Remove the flange shaft.
 Note
Note
If it not possible to remove the flange shaft by hand, then use the Slide Hammer Set -VW771- to remove it.
- Remove flange shaft seal with the Slide Hammer Set -VW771- and Slide Hammer Set - Pulling Hook -VW771/37-.
Installing
Install in reverse order of removal. Note the following:
Right Shaft Seal, Installing
- Coat the outer circumference and the sealing lips on the shaft seal with ATF.
- Install the shaft seal all the way. Be careful not to bend it.
Left Shaft Seal, Installing
- Coat the outer circumference and the sealing lips on the shaft seal with ATF.
- Install the shaft seal all the way. Be careful not to bend it.
- Install the flange shaft.
Note
If it is not possible to install the flange shaft all the way in by hand, then use a plastic mallet.
- Tighten the new flange shaft bolt to the tightening specification. Refer to -item 1-.
- Install the rear final drive. Refer to → Chapter "Final Drive, Removing and Installing".
- Check the ATF level in the rear final drive. Refer to → Chapter "ATF Level, Checking, 0BE, 0BF".
Right Seal, Replacing
Note
Replacing the right seal is described in the chapter "left seal, replacing".
