Audi A6 Typ 4G: Rail, Removing and Installing
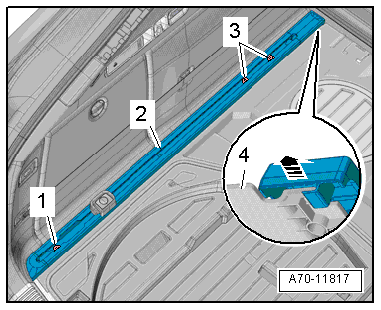
Removing
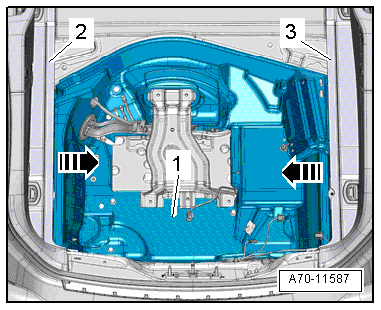
- Fold the rear seat backrest forward.
- Remove the bolts -1 and 3-.
- Slide the rail -2- slightly forward in direction of -arrow- and remove it from the luggage compartment floor panel trim -4-.
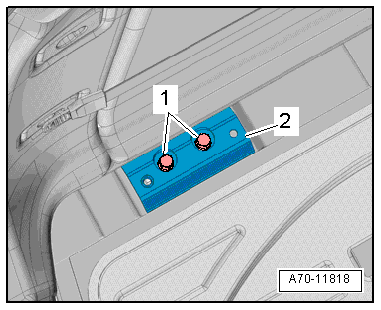
Rear Bracket, Removing
- Remove the bolts -1-.
- Remove the mount -2- under the luggage compartment side trim panel.
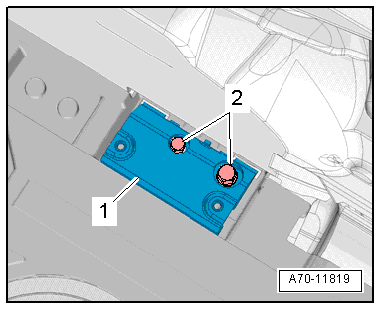
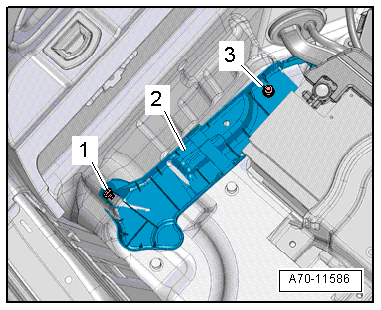
Front Bracket, Removing
- Remove the luggage compartment side trim. Refer to → Chapter "Luggage Compartment Side Trim Panel, Removing and Installing, Avant".
- Remove the bolts -2- and remove the bracket -1-.
Installing
Install in reverse order of removal. Note the following:
Installation notes, for example tightening specifications, replacing components. Refer to → Chapter "Overview - Luggage Compartment Floor, Avant".
Spare Wheel Well Trim, Removing and Installing
Spare Wheel Well Trim, Removing and Installing, Sedan
Removing
- Remove the rear cross panel trim. Refer to → Chapter "Lock Carrier Trim Panel, Removing and Installing, Sedan".
- Vehicles with a spare wheel: remove the spare wheel.
- Remove the vehicle tool kit mount.
- Vehicles with a vehicle jack: remove the nuts -1 and 3- and remove the jack and the mount -2-.
- Vehicles with break-down kit: remove the break-down kit.
- Pull out the spare wheel side well trim -1- under the luggage compartment side trim panels -2 and 3- in direction of -arrows- and remove them upward.
 Note
Note
Loosen the bolts on the rear tie down if it is difficult to remove the trim panel. Refer to → Chapter "Tie Down, Removing and Installing".
Installing
Install in reverse order of removal. Note the following:
Installation notes, for example tightening specifications, replacing components. Refer to → Chapter "Overview - Luggage Compartment Floor, Sedan".
Spare Wheel Well Trim, Removing and Installing, Avant
Removing
- Remove the luggage compartment liner. Refer to → Chapter "Luggage Compartment Floor Panel, Removing and Installing".
- Remove the replacement part and the spare wheel well cover.
- Remove the rails. Refer to → Chapter "Rail, Removing and Installing".
- Remove the rear cross panel trim. Refer to → Chapter "Lock Carrier Trim Panel, Removing and Installing, Avant".
- Remove the luggage compartment side trim. Refer to → Chapter "Luggage Compartment Side Trim Panel, Removing and Installing, Avant".
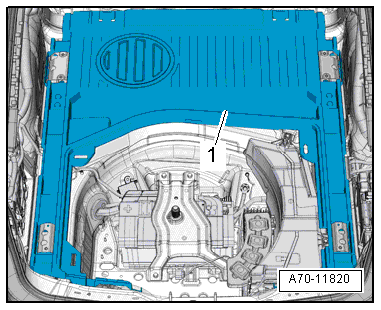
- Remove the luggage compartment floor panel trim -1- toward the rear through the door opening.
Installing
Install in reverse order of removal. Note the following:
Installation notes, for example tightening specifications, replacing components. Refer to → Chapter "Overview - Luggage Compartment Floor, Avant".
Tail Lamp Cover, Removing and Installing
Removing
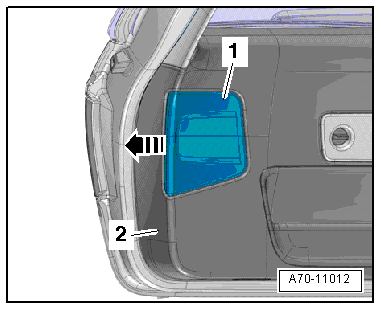
- Unclip the tail lamp cover -1- from the rear lid lower trim panel -2- in the direction of the -arrow-.
Installing
Install in reverse order of removal. Note the following:
Installation notes, for example tightening specifications, replacing components. Refer to → Chapter "Overview - Rear Lid Trim Panel, Avant".
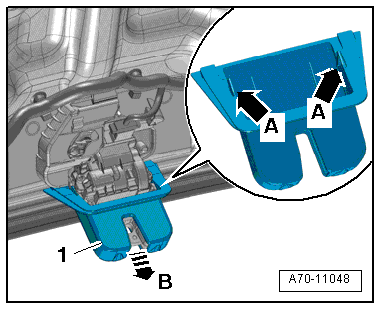
Rear Lid Lock Trim Panel, Removing and Installing
Removing
- Remove the lower rear lid trim panel. Refer to → Chapter "Lower Rear Lid Trim Panel, Removing and Installing, Avant".
- Release the tabs -arrows A- with a screwdriver and remove the rear lid lock trim -1- from the rear lid lock in direction of-arrow B-.
Installing
Install in reverse order of removal.
Installation notes, for example tightening specifications, replacing components. Refer to → Chapter "Overview - Rear Lid Trim Panel, Avant".