Audi A6 Typ 4G: Wheel Bolts
Wheel Bolt Types
 Note
Note
Make sure the correct wheel bolts are installed. Refer to
the Parts Catalog.
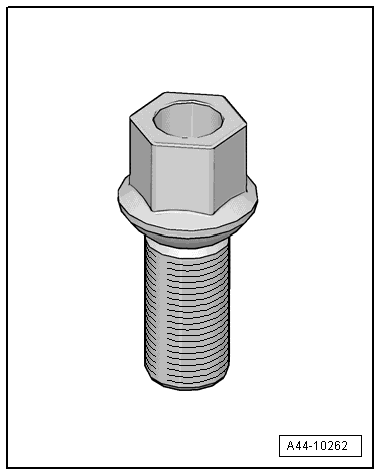
Standard, One-Piece Wheel Bolt
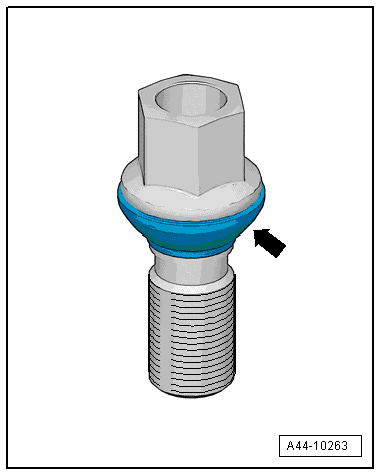
Two-piece wheel bolt, short turnable spherical calotte,
primarily for S models.
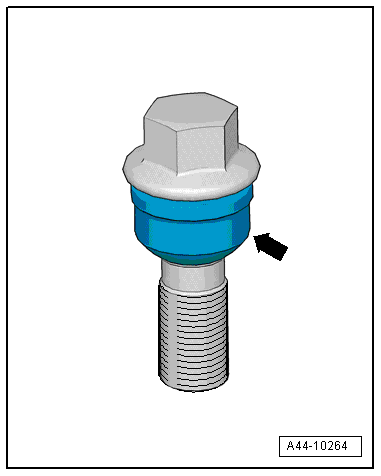
Two-piece wheel bolt, short turnable spherical calotte,
primarily for S models.
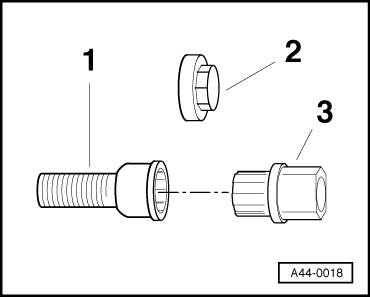
Anti-Theft Wheel Bolts
1 - Anti-theft wheel bolts
2 - Cap
3 - Wheel bolt adapter
Master Sets for Anti-Theft Wheel Bolts
Special tools and workshop equipment
required
- Torque Wrench 1332 40-200Nm -VAG1332-
- Wheel Lock Set -T10101-
- Wheel Lock Set -T10101A-
- Wheel Lock Set -T40004-
- Wheel Lock Set -T40073-
READ NEXT:
Wheels and Tires, General Information
Only install tires with the same manufacturer, construction
type and tread on all wheels.
Always replace rubber valve when replacing steel wheel or
rim.
Install
Assembly Sequence
- Fold the valve -1- downward
-arrow A toward B-.
- Slide the valve with the wheel electronics attached through
the valve opening in the rim.
- Rotate the union nut
Example: Dunlop SP Sport 9000
1 - Size Designation (215/55 ZR16)
Label on PAX tires. Refer to
→ Chapter "Run-Flat Tire (PAX), Labeling On Sidewall"
2 - Manufacturer (T
SEE MORE:
If this indicator light turns on, there is a malfunction
in the brake system.
BRAKE (USA models)
(Canada models) Stop vehicle and
check brake fluid level.
Stop the vehicle and check the brake fluid level.
See an authorized Audi dealer or authorized Audi
Service Facility for assistance if necessa
Overview - Rear Window
Overview - Rear Window, Sedan
Note
Certain connections are included with the replacement rear
window that are meant to be used only for certain optional
equipment.
Remove any unnecessary cable ends directly at the connection
on the rear window.
1 - R
