Audi A6 Typ 4G: Rear Brake Caliper
Overview - Rear Brake Caliper
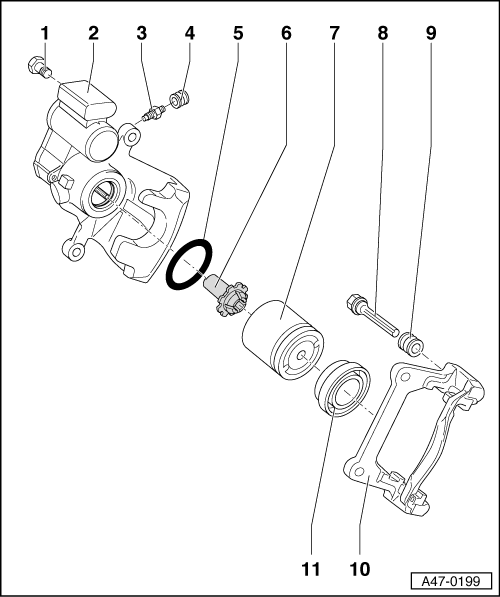
1 - Bolt
- Tightening specification -item 6-.
2 - Brake Caliper Housing
3 - Bleed Screw
- Tightening specification -item 4-.
4 - Protective Dust Cap
5 - Seal
- Coat with a thin layer of lithium grease. Refer to Parts Catalog.
6 - Thrust Nut
- For actuating the parking brake
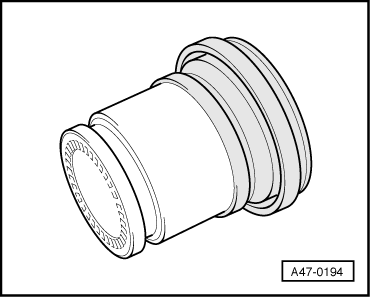
7 - Brake Caliper Piston
- Removing and installing. Refer to → Chapter "Brake Caliper Piston, Removing and Installing".
- Coat with a thin layer of lithium grease. Refer to Parts Catalog.
8 - Guide Pin
- Grease before pulling on the bearing bushing
- Delivered as a replacement part with sufficient grease.
9 - Bearing Bushing
- Pull onto the brake carrier and guide pin.
10 - Brake Carrier
- With guide pin and bearing bushing
- Delivered as an assembled replacement part with sufficient grease on the guide pins
- Install the repair kit if the caps or guide pins are damaged. Use the supplied grease packet to lubricate guide pins.
11 - Protective Cap
- Removing and installing. Refer to → Chapter "Brake Caliper Piston, Removing and Installing".
Brake Caliper Piston, Removing and Installing
Special tools and workshop equipment required
- Trim Removal Wedge -3409-
- Piston Resetting Tool -T10145-
- Protective Eyewear
- Safety Gloves
- Lithium grease. Refer to the Parts Catalog.
Removing
- Remove the brake caliper and disconnect from the hydraulic system. Refer to → Chapter "Brake Caliper, Replacing".
- Tension the brake caliper in a vise with protective covers over the jaws.
 WARNING
Risk of injury!
- Wear protective eyewear.
- When removing the brake caliper piston, never touch the brake caliper chamber with fingers.
- Place a cloth over the brake caliper chamber to catch any spraying brake fluid. Place another cloth tightly around the compressed air gun nozzle on the brake caliper.
- To prevent skin contact with brake fluid, wear chemical resistant safety gloves.
 Note
Note
- When removing the brake caliper piston and the protective cap make sure that the paint coating on the brake caliper is not damaged.
- When removing, make sure that the cylinder surface is not damaged.
- Remove the piston from the brake caliper as far as possible.
- Place a piece of wood in the brake caliper chamber so that the brake caliper piston will not be damaged when pressed out.
- Position the compressed air gun nozzle on the hole for the brake hose and press the brake caliper piston out of the brake caliper.

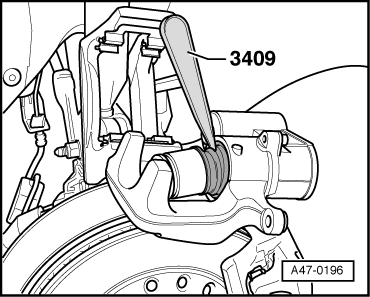
- Remove the seal from the brake caliper using the Trim Removal Wedge -3409-.
Installing
Note
- Install the entire repair kit.
- Only use mineral spirits to clean the brakes.
- When a brake caliper piston or a piston cylinder are damaged, the brake caliper must be replaced.
- Clean the surfaces on the pistons and seal only with mineral spirits and then dry.
- Thinly coat the brake caliper pistons and seals with lithium grease before installing.
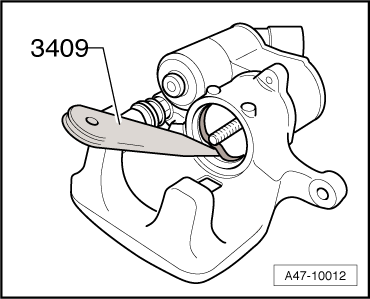
- Install the seal in the brake caliper using the Trim Removal Wedge -3409-.
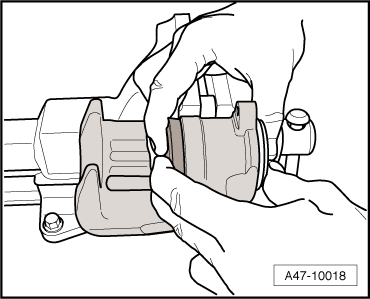
- Place the protective cap on the brake caliper piston as shown.
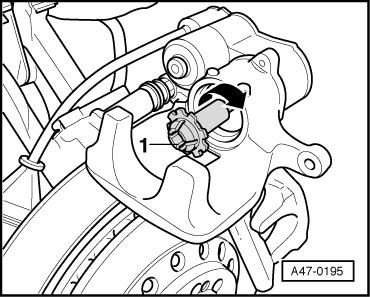
- Install the pressure nut -1- clockwise -arrow- all the way into the brake caliper and then loosen it one quarter of a turn.
- Insert the protective cap into the groove in the brake caliper using the Trim Removal Wedge -3409-.
- Push the brake caliper piston carefully into the brake caliper. Move the brake caliper piston while doing this.
- The brake caliper piston must be guided over the pressure nut.
- After the brake caliper piston has been guided onto pressure nut, press it as far as stop into brake caliper.
Note
Be careful not to damage the pressure nut.
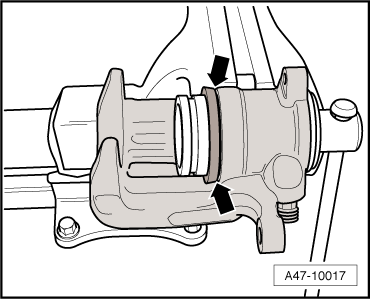
- The seal must contact the brake caliper all the way around -arrows-.
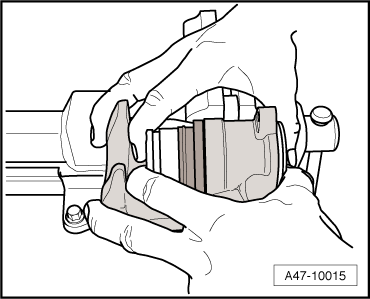
- Press the piston into the brake caliper by hand
- The inner sealing lip of the protective cap thereby slips into the groove on the piston.
Note
- The Piston Resetting Tool -T10145- can also be used to push in the brake caliper piston.
- Make sure that the protective cap is guided into brake caliper piston groove when the brake caliper piston is pressed all the way in.
- Install the brake caliper. Refer to → Chapter "Brake Caliper, Replacing".